
In our living room, I'm trying to incorporate some burlap into the decor. I'm just really digging the burlap fad right now and plan on embracing it as long as socially acceptable.
There for a while I saw this pin every time I was on Pinterest. Chances are, you have too!

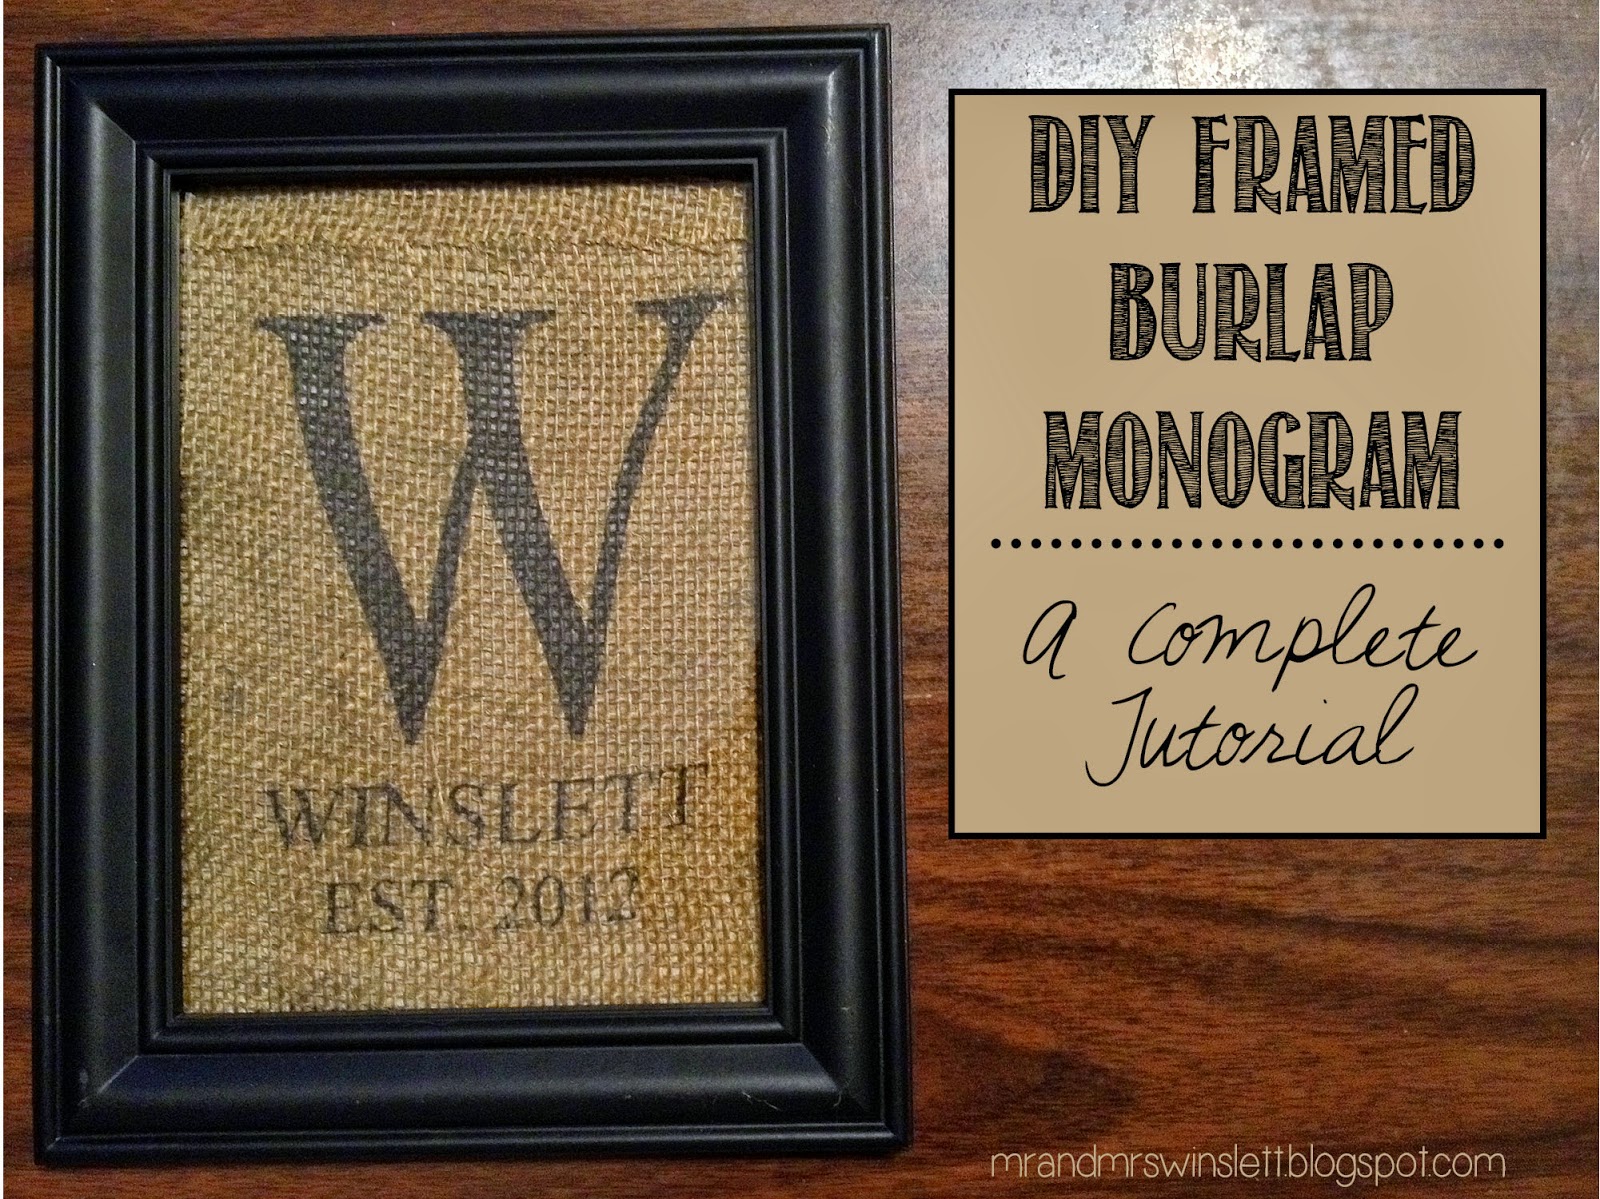
We have a fairly large photo gallery display on one of the walls in our living room. I was left with a frame that was pictureless so I thought this would be a good addition to the gallery.
However, to my dismay, I could not find the original source for the pin. Time to get creative. I researched some tutorials on how to print on burlap. I altered them slightly to fit my needs and this is the result:

This project was so simple and easy to do. Seriously, it probably took me 15 minutes start to finish. Ready for the tutorial?
What You Need:
Burlap
Printer
Cardstock
Spray Adhesive
Scissors
Step One. Cut the cardstock to the size of your frame. (Mine was a 5x7) Spray the adhesive on one side of the cardstock. Lay the sticky, adhesive side on the burlap. Cut around your cardstock.

Step Two. Stick your burlap paper in the printer. Make sure you've got it facing the right way for your printer.
Step Three. Open your word processing software like Microsoft Word, Adobe Illustrator, InDesign, etc. (I used InDesign) Using your word processor, format your monogram.
Step Four. Print out your monogram. Remember to format the printer settings to the size of your paper in your program.
Step Five. Peel off that cardstock, stick that burlap in the frame and there you have it folks!

During my research, I did run across some tutorials that used freezer paper as the adhesive element. However, I had spray adhesive in my supplies not freezer paper so...yeah!
Keep Crafting!
Miranda
This post was linked at:
Monday: C.R.A.F.T., Craft-O-Maniac, Making the World Cuter, Keeping It Simple Crafts, Rain on a Tin Roof, The Dedicated House, Alderberry Hill, Mad in Crafts, I Should Be Mopping the Floor, The Gunny Sack, Home Stories A to Z, Home Coming
Tuesday: Kammy's Korner, Sugar Bee Crafts, Adventures of a DIY Mom, Chef in Training, Not Just a Housewife, Him and Her, A Stroll Thru Life, Mad Cap Frenzy, A Bowl Full of Lemons, Coastal Charm
Wednesday: We Like to Learn as We Go, Polkadots on Parade, No Minimalist Here, From My Front Porch to Yours, Yellow Bliss Road, No Minimalist Here, Sew Much Ado, Seven Alive, Simply Designing
Thursday: 52 Mantels, Live Laugh Rowe, A Glimpse Inside, Stone Gable, The Girl Creative, Bloom Designs, Blissful and Domestic, Crafts a la Mode, From My Front Porch to Yours, 52 Mantels, The Shabby Creek Cottage, Live Laugh Rowe, Bloom Designs, Stone Gable, The Girl Creative
Friday: The Dedicated House, Blissful and Domestic, Craft Dictator, DIY Vintage Chic, Shaken Together, 504 Main, Craftionary, The Grant Life, Thirty Handmade Days, Redoux Interiors, Simply Sweet Home, Just Us Four, Romantic Home, The Jenny Evolution
Miranda, I LOVE this! I am also loving the burlap fad and have incorporated it into my living room. This would be perfect for my space as well. I may be doing this in the very near future, it is adorable!!!
ReplyDeleteThank you so much! I was really pleased with how well it turned out. You should definitely take a stab at it!
DeleteThis is beautiful! Great job. Don't forget to link up to The DIY'ers. http://homecomingmn.blogspot.com/2013/09/the-diyers-30.html
ReplyDeleteVery cute! I love how simple it was to make.
ReplyDeleteThank you! I am quite pleased with it. :)
DeleteLove your burlap monogram, it looks so cute. Thanks so much for linking to Inspire Me. Hugs, Marty
ReplyDeleteMy pleasure! Thanks for stopping by!
DeleteWhat a great idea! It is so much simpler than I feel like I would've made it. Thanks for sharing!
ReplyDeleteI love this idea! Thank you so much for sharing the "how to".
ReplyDeleteBlessings
Patti
What a great project and tutorial! Love the look of burlap, looks great framed!
ReplyDeleteI found you through Homemade By You Link Party where I have the following projects linked;
Ghost Card and Free Cut File,
Thank You Card, and
Boolicious Freebie Sentiment
would love it if you'd stop by too.
Hugs, antonella :-)
This is such a great project. Thanx for sharing it over at THT!
ReplyDeleteSo cute! Thanks for linking up with Tickled Pink Times Two. Can't wait to see even more of your creativity :)
ReplyDeleteMy pleasure! And there definitely more of that coming in the future!
DeleteThanks for sharing this with the Totally Tuesday Link Party! It was featured! Come check it out and get your Featured button. ;)
ReplyDeletehttp://madcapfrenzy.blogspot.com/2013/10/september-totally-tuesday-wrap-up.html
Thanks for the tute.. love it. Linda
ReplyDelete