
Welcome back to DIY Weekend!
Before we dive into DIY Weekend, I'd like to take a moment and congratulate Jennifer Rae for winning our 200th Order Celebration Giveaway! Jennifer won this adorable gray chevron infinity scarf from Pick Your Plum.

Now then, back to DIY Weekend! What is DIY Weekend? Every Thursday, I host this link party to showcase my top three DIY project picks from last week's link up party and give you a chance to show off your latest projects. You can link up just about any topic and share your tips, tricks, projects and more! If you don’t have a blog to link up with, take a minute to browse the links! There really are some great blogs out there with wonderful ideas. For example, our three showcase projects:

Black and White Table from Craft Dictator
.JPG)
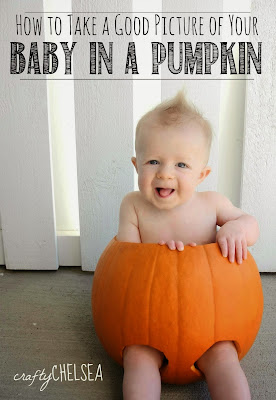
How to take a Good Picture of Your Baby in a Pumpkin from Crafty Chelsea
**Please note: By linking to this blog party, you are giving Mr. and Mrs. Winslett permission to use your photos and content as part of the weekly features if selected.**
All featured projects will also be pinned to my Pinterest boards. What are you waiting for then? Oh! The house rules, of course:
All featured projects will also be pinned to my Pinterest boards. What are you waiting for then? Oh! The house rules, of course:
1.) Link up any crafts, recipes, home decor, tips, etc. but don't forget to link back here!
2.) PLEASE be sure to link to your specific post not your general blog.
3.) PLEASE visit and comment on the post before you and after you, on top of any others that catch your eye. Everyone loves comment love!
3.) PLEASE visit and comment on the post before you and after you, on top of any others that catch your eye. Everyone loves comment love!
4.) And most importantly... HAVE FUN!!


.JPG)


