February 27, 2013

Poppy, Pale Pink and Glitter Gold

Happy Wednesday!

Honestly, it feels like it should be Friday to me, but I'll settle for Wednesday. To take my mind off of all the craziness of the past week, I've been day-dreaming of my future office/craft room in my future home. I've already decided on a color scheme:

poppy, pale pink + gold
Poppy + Pale Pink + Glitter Gold
While it may not be everyone's cup of tea, I'm in love with it. I've been contemplating throwing in a mint or emerald green as an accent color. Naturally, I've been hording ideas for my new space on Pinterest. Here's a few inspiration pictures I've gathered thus far:


Can we PLEASE move already?! I need this. Haha!

Until next time,
Miranda 


February 22, 2013

Friday's Letters


Dear husband, I absolutely love how much your family means to you. That's one of many reasons I fell in love with you. Though we have been on an emotional roller coaster this week, you never missed a step when someone you loved needed you. You are so right - family is determined by love not blood. Dear house hunt, have we really found the one?! Just maybe! I'll be crossing my fingers and wearing my lucky underwear until you are mine. Dear Kim, happy 50th birthday! We hope it was everything you wanted and more. You are special to me and you are so loved by those who know you. Dear sleep, we've got a date tonight. Pick me up earlier than you did last night, alright? Thanks! Dear Bentley, I'm very glad you are such a friendly little puppy, but we do need to work on distinguishing good from bad. Just because your Uncle Pete is a pit bull who thinks he is a teddy bear does not mean the stray pit bull that was creepin' in our apartment complex this week was nice. Despite what you thought, he did not want to play with you. In fact, I think he wanted to eat you.  Dear Project Life, I sure wish my pictures would hurry up and come so I can start working on you!

Until next week!
Miranda


February 19, 2013

Project Life: Ready, Set, Scrap!


Greetings!

I've had some questions and interest about my latest scrapbooking venture, Project Life. If you know me personally, you know that I love scrapbooking. When I stayed on campus over the weekend during my college years, it was a safe bet my dorm room floor was covered with pictures, papers, embellishments, glue dots and other scrapping paraphernalia.

Unfortunately, last year I fell really behind. Between moving three times, wedding planning and graduating, I had to set it aside for some time. After that, anytime I started daydreaming of picking up my photo cropper, I'd chicken out thinking about how far behind I was. My wedding scrapbook was the only album I completed of last year's happenings.

I needed a new plan of attack for staying in control of the upcoming year's scrapbooking. After reviewing and researching the Project Life method, I've decided to try to apply it this year.

So, what is Project Life? Technically, it is a product line created by Becky Higgins which is aimed at taking the guess work out of layout design. Her product line offers up a variety of coordinating albums, journaling cards and photo pocket pages.

Ultimately, Project Life is a method of scrapbooking using pocket pages to lay out a page without glue or fancy embellishments. It's specifically focused on recording memories through journaling instead of spending all your time jazzing up your page with glitter, stickers and rub-ons.

In order to stay on top of my pictures, I've decided to tackle Project Life on a week-by-week basis. That means one two-page spread will be devoted to one week of our lives and latest antics. Since it is already half way through February, I've decided to only do a month overview of January instead of breaking it down by weeks.

The only perceivable downside I see to the method so far is there isn't really a place for mementos like brochures from vacations or the like. My idea to solve this is my Smash Book. When we go on vacation in September, I'll take my Smash Book to document our trip and house our momentous instead of devoting a few pages to it in our album.

As you can see from the picture above, I've done our title page. Once we have a family picture made this year, I'll put two of them in the empty spaces above.

Until next time!
Miranda


February 17, 2013

Friday's Letters

Dear Friday's Letters, I hate to break it to you, but you are actually Sunday's Letters instead. Sorry! Dear husband, you coached your first baseball practice for the Ranger this week. Even though I spent my first married Valentine's Day at the ball fields, it was worth every Valentine's Day to see you out there having fun and sharing a sport that you love. Dear cold, I lasted a whole month and a half without catching you again. Guess that was too good to be true. Also, why do I always catch you on a weekend?! Dear Bentley, we discovered you are in love with chocolate this week. I really don't understand how your tummy works. When we feed you something that shouldn't upset your tummy, you have diarrhea for days. Then, you sneak something -chocolate- that is commonly known not to be good for little puppies and you are perfectly fine. I still can't figure out how you popped our bedroom door open while we were at work to sneak that bag of Reese's you ate. Next time, don't eat the wrappers too! Dear Pinterest followers, I sincerely apologize for blowing up your feed with my Project Life pins. I just got really excited about starting a new scrapbook album using this method.

Until next time!
Miranda

February 13, 2013

Pinterest Test: Philly Cheesesteak Bell Peppers


Greetings!

Last night, hubby and I tried out the Philly Cheesesteak Bell Peppers I pinned a few weeks ago. I pinned the recipe when it crossed my feed because Philly Cheesesteak's are one of hubby's favorites. 

Here's the recipe:

 INGREDIENTS
8 oz. Thinly Sliced Roast Beef
8 Slices Provolone Cheese
2 Large Green Bell Peppers
1 Medium Sweet Onion
6 oz. Baby Bella Mushrooms
2 Tbs. Butter
2 Tbs. Olive Oil
1 Tbs. Garlic – Minced
Salt and Pepper – to taste
(2 Tbs. Peace and Love)

DIRECTIONS
Slice peppers in half lengthwise, remove ribs and seeds.

Slice onions and mushrooms.  Saute over medium heat with butter, olive oil, minced garlic and a little salt and pepper.  Saute until onions and mushroom are nice and caramelized.  About 25-30 minutes.

Preheat oven to 400*

Slice roast beef into thin strips and add to the onion/mushroom mixture.  Allow to cook 5-10 minutes

Line the inside of each pepper with a slice of provolone cheese. 

Fill each pepper with meat mixture until they are nearly overflowing.

Top each pepper with another slice of provolone cheese.

Bake for 15-20 minutes until the cheese on top is golden brown. 

Serve and Enjoy!!

Makes 4 servings –  6 net carbs per serving 

Many thanks to Kyndra over at Peace, Love and Low Carb for this DELICIOUS recipe. R.J. and I both loved it and agreed to add it to our recipe repertoire. Next time, we are going to try this recipe with some bacon sprinkled on top - per hubby's suggestion. 

Enjoy!
Miranda


February 10, 2013

Milestones, Date Saving and Prayers

Stop the presses! 

This blog has just passed a monumental milestone - at least, it's monumental to me. My last post on how to put together a wedding scrapbook pushed our blog view number to just over 10,000 views! There are people out there who actually want to read what I write. My inner journalist is jumping up and down for joy. With that said, THANK YOU! I couldn't be more pleased.

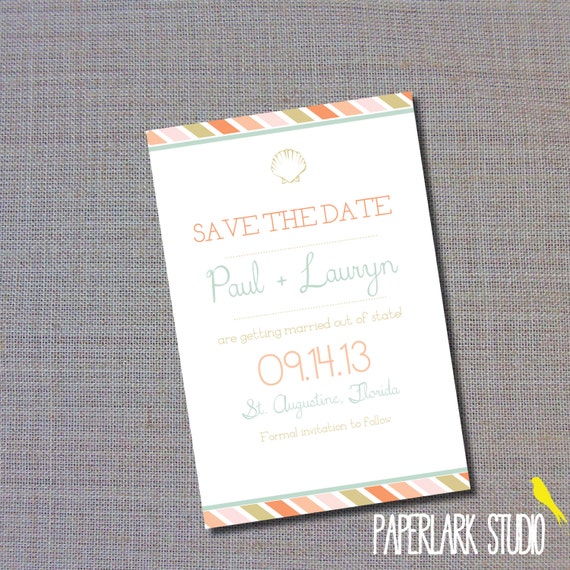
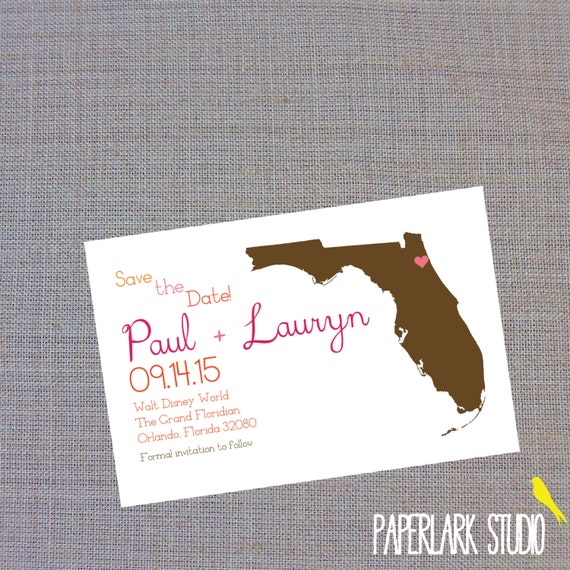
Now then, back to what I'm really posting about today: Lauryn's wedding! A few weeks ago, I told you about Lauryn and her upcoming nuptials! If you missed it, you can read about it here. Her save-the-dates are officially in the hands of guests which means I can share them with you now.


I made a couple different designs for Lauryn. My two favorites (the one she picked and the other one below) ended up getting posted for sale in my Etsy shop. 

Beach wedding save the date
Florida Destination Beach Wedding Save the Date

As I'm sure you noticed from the very first picture, we decided to use kraft paper instead of white cardstock. Her wedding will be on the beach so we wanted the STD to have an earthy, sandy feel. The kraft paper gave us that.


What are we up to now? The actual wedding invitations! We've narrowed down a theme for them (which I will share with you all after they go out) and that we will need an invitation suite. Having never done a wedding invitation suite, I'll be diving headfirst and feeling my way around, but I've already got some different ideas I think our bride will love!

As for my Etsy shop, I've been steadily churning out printing orders. In January, PaperLark reached a new profit high (YAY!) and is on track to surpass that milestone for February (BIGGER YAY!). I should've started offering custom printing ages ago! I have to have my application for Newnan Market Day in by Feb. 22 with my fee. I'm hoping and praying I'll be able to scrape by with my Etsy money to make that happen. PRAYERS APPRECIATED!

Until next time!
Miranda


February 8, 2013

Friday's Letters

Dear husband, you are so excited about coaching your 10 and under baseball team. It's nice to see you so excited about something again. I know you will be great at it and I can't wait to watch you and the Rangers get some wins under the belt this season. Dear Bentley, you have been such a snuggle bug this week and I'm loving it! It is a relief to know that some day maybe - just maybe - you'll settle down and not be such a spazz. Dear future house, every day we get a step closer to you. While I don't know which house you will be exactly, I know you are out there and I'm ready for you! Dear week, you went by really quickly. I hope the weekend will not go by as fast as you did. Dear PaperLark, I'm hoping to add some new listings to you next week. You never fail to always give me enough to do. Dear August, I really hope the teaching opportunity you are offering me will come through. It will feel so good to be divulging into the worlds of political science and journalism again. Don't tell anyone - but I secretly miss school.

Until next time!
Miranda

February 5, 2013

The Wedding: Our Wedding Scrapbook


Greetings readers!

I have a long awaited treat for you today - my wedding scrapbook! Finally, right? I'm really happy with how it turned out and I think it will definitely be a wonderful keepsake for the years to come.

Before I dive in and share it with you, I'd like to explain how I did it. I ordered nine pounds of pictures! I had collected over 1,000 photos of our wedding and wanted each one of them printed. If something happened to the digital originals, I wanted a tangible copy. After all, it was a very special day that I'd like to share with my children someday. I didn't want to risk them accidentally getting lost in a computer crash or the like.

So...how do you sort 1,000+ pictures and condense them into an organized scrapbook? Ha! That was a major task in-and-of itself. I separated my pictures into the following categories:

  • First Look
  • The Ceremony
  • Family Pictures
  • The Reception: Food and Drink
  • The Reception: Wedding Cake and Cutting
  • The Reception: Decor
  • The Reception: The Getaway
  • The Reception: People
  • The Reception: Dances
Now then, I certainly did not stuff all 1,000+ pictures in my wedding scrapbook. After organizing my pictures into their respective categories, I weeded out my favorite and best pictures I wanted in my album. With the leftover pictures that didn't make the cut, I placed them in the picture envelopes from Shutterfly that they came in, labeled them and placed them in a photo box for storage.

My photo box
When I made the wedding Smash Book, I went back to my photo box and dug out the pictures I wanted to use for it.

I do have some tips for anyone wanting to tackle a similar project of their own:
  • The color scheme has already been chosen for you: your wedding colors!
  • Clip your coupons, head to your local craft store and splurge on a paper pack that has your wedding colors in it to save time hunting down coordinating papers. I used the Mosaic Memories Paper Pad by Recollections because it had not only my colors, but a country theme as well. 
  • Organize your scrapbook chronologically. By doing so, it will walk those looking at the scrapbook through your BIG day as it happened. 
  • Also, work on your scrapbook chronologically. Start with your intro page, first look, then ceremony, etc. Why? Because you may have more pictures from one category than the next. You may have three pages of first look and only one of ceremony. Odd numbers can throw off your flow so plan accordingly.
  • If you aren't a big scrapbooker OR have a TON of pictures, consider intermingling photo sleeves like these into your scrapbook. You'll see them sprinkled in my scrapbook. 
  • Lastly, invest in a scrapbook storage box in addition to the photo box. My mother-in-law gifted this one to me for Christmas and I love it. At the bottom of this post, I'll share with you what all my storage box contains because more than just your scrapbook will fit!

Without further adieu, I'd like to present you with my completed scrapbook. You will see it from the first page to the last page. I hope it inspires you!


Almost ALL of the journaling in my scrapbook is from my previous wedding series on this blog!


Woosh! That was a lot of pictures to upload. Seriously, my eyes are hurting right now. However, I've got to show you the goodies in my scrapbook storage box. 


What's inside:
- Scrapbook (duh...)
- Wedding cards collected from my showers, the actual wedding and from the mail
-Activity book from the wedding
-Newspaper announcement
-My sash from my bachelorette party 
- Day-of schedule
- Wedding color swatches
- Smash Book journal


And yes, I labeled my storage box with a labeler. Don't judge me! So, there you have it! A completed wedding scrapbook safely stored with all keepsake memorabilia. 

If it seems overwhelming, just take it one step at a time and do it at your own pace. I'm so glad I took the time and effort to create this keepsake for my family. It'll be worth it. Promise!

Until next time!
Miranda

Related Posts Plugin for WordPress, Blogger...
Powered by Blogger.
Designed By Boutique-Website-Design