Showing posts with label Take-A-Look Tuesday. Show all posts

November 20, 2014

DIY Vintage Window Christmas Advent Calendar


For the last couple of years,  I wanted to do an advent calendar. However, when you don't have any children, I don't think it drums up the same excitement. But, I decided to make an advent calendar for my two little fur balls that I knew would get excited everyday about it. Ha! In each bag, I've stuck a dog treat for each pup. Even though they won't understand {or care for that matter} why they'll be getting a treat for 24 straight days, it'll make me happy.

I had an old window sitting down in the garage that I had rescued a while ago from a barn. I've been holding onto it, waiting for the right project to come along. Alas! I thought it would make the perfect addition to my advent calendar. 

I pulled the window out of the garage, wiped it down really well and got to work. This project didn't actually cost me anything because I had all the supplies already {big yay for being a craft supply horder!}. However, if you can get your hands on an old window, I'm sure this project wouldn't take much to make. 


What I used:
Old window
Twine
Hot glue gun and glue sticks
Brown paper bags
Ribbon
Scissors
Stapler
Paint Pen
Treats for the bags

Step One. Create your bags. I used large lunch paper bags. Because the large bags were clearly too big, I cut them into fourths and just stapled the edges to make my smaller bags. {Of course, you could buy small paper bags and skip this step} 

Step Two. Once I had 24 smaller bags, I took a paint pen and drew my letters on each bag. Let these dry really good and then stick your treats in, folding over the top. 

Step Three. Prepare your window. Measure out your twine and then glue it on the back of the window frame. Do this with each twine piece you'll need. {On my window, I used five twine lines and fit five bags on each - expect for the last one which only had four bags.} Let the glue harden.


Step Four. Tie your pretty ribbon in a bow onto the twine and then staple the bag to the ribbon. Do this for each of the 24 bags. I staggered the lengths of my ribbon so the bags would hang at different lengths just to give it some character. 


Once you have all 24 bags tied and stapled, you can embellish your window frame any way you'd like. My window had one pane of glass left in it, so I took a paint pen and did a little hand lettering to jazz it up. I also added some garland around the outside. 


My advent calendar is now resting on top of a short bookshelf beside our Christmas tree. It took my Yorkie, Bentley, less than 24 hours to discover mom's new creation had dog treats in it. He spent a better part of this morning arrff-ing at it, trying to convince me we should start adventing today. I gave him a chew bone in hopes he will forget about it and so far so good.   

Oh! And a quick tip if you need to purchase some materials for this project. Be sure to check out Raise.com! This handy site lets users purchase gift cards for less than their value which will help you save some extra cash. They do have gift cards to Joann's and Michaels {and more}. I'm trying to get into the habit of checking this website to see what gift cards they have if I'm planning a big project. I've seen gift cards up to 23% off. Every little bit helps! 

https://www.raise.com/buy-gift-cards
https://www.raise.com/sell-gift-cards 

Happy creating!
Miranda


November 6, 2014

Easy No-Sew Tree Skirt Tutorial


Once upon a time {a.k.a. last month}, I decided to hunt for a larger Christmas tree. Last Christmas was our first in the house. The husband and I both agreed that our skinny, apartment-friendly six-footer looked a little out of place in our much larger living area.

I'd like to take a moment to get on my soap box: Why are artificial Christmas trees $300 or more? Are you people crazy?! That said, I hunted for my larger tree on Craigslist. Ha! After about a week or so of hunting, we bought a 7.5 foot Christmas tree for $35.

When we got it home, I wanted to put it together to a) revel in my thrifty, money-saving prowess and b) make sure I had all the pieces. After nearly two and a half hours of sorting through color-coded branches, I finally got that darn thing up and it was huge.

After seeing how fat and round the bottom of my new tree was, I knew my old, dinky tree skirt wouldn't even be visible. I needed a tree skirt that was 56" or bigger for this tree and those aren't cheap either at $60 or more.

The motto for this tutorial? Look for it on Craigslist. If you can't find it on Craigslist, make it.

Quick note: I purchased a 60" round tablecloth to use as the base of my tree skirt. It was cheaper than purchasing burlap fabric at the store. Plus, it saved me time from having to sew and hem the edges. The diameter of my tree is 55 inches. Here's how I made my 62" no-sew tree skirt:


Round Tablecloth
Paper Plate
Scissors
6" Burlap Ribbon (I used about 100 yards) 
Hot Glue Gun
Glue Sticks
String
Large Threader Needle


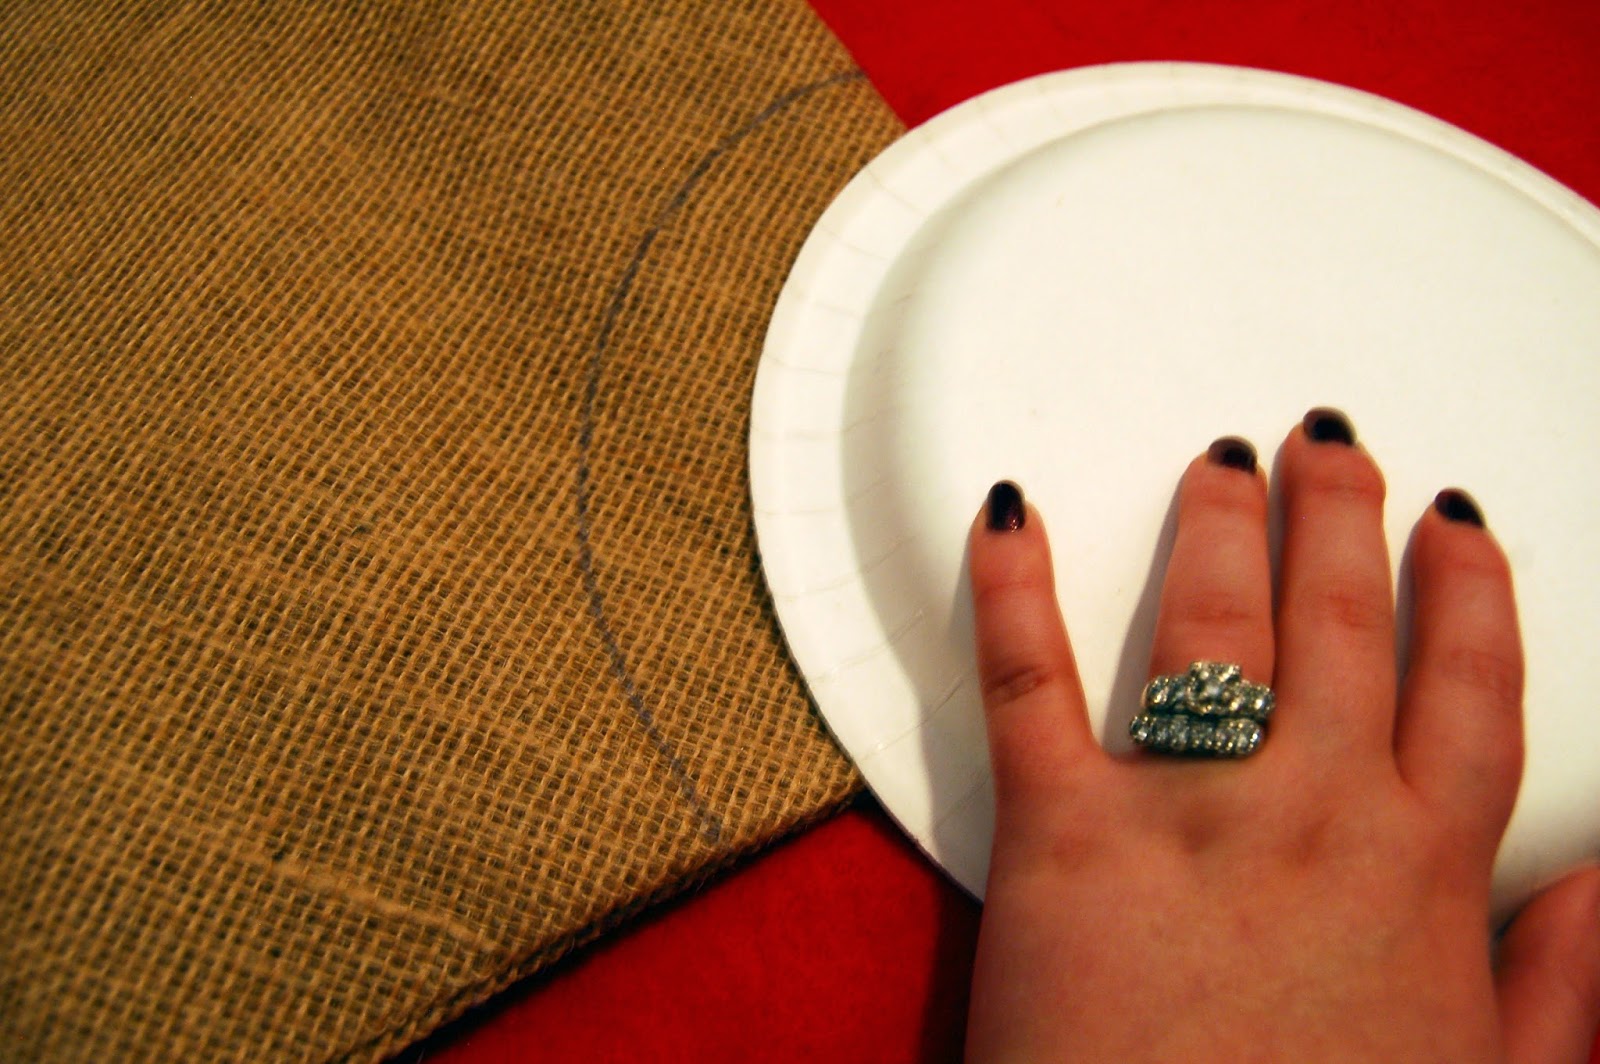
Step One. Fold your tablecloth into quarters. Using your paper plate as a guide, trace a quarter circle on the folded tablecloth corner. Cut along your traced line.


Step Two. Gather your burlap ribbon to make the ruffle. To do this, thread your string (yarn would work just as well) through the burlap using the large threader needle. {Note: Initially, I tried using regular thread, but it wasn't heavy duty enough to pull my burlap ribbon into a ruffle with.}


Gather your burlap ribbon on the string to create the ruffle. You'll have to do this with each roll of your burlap ribbon. 

Step Three. Once your burlap ribbon is all gathered and ready to go, simply glue the gathered edge around tablecloth hem. {Another perk to using the tablecloth - you don't have to worry about the glue seeping through the burlap! Just keep the glue on the hem.}

I didn't make an opening for my tree skirt. I like the solid, uniform look of my tree skirt. I just laid it over the top of the tree stand and then assembled the tree. To create an opening, simply cut a straight line from your hem to your middle.

In total, I spent about $25 on this tree skirt. 


As for the super-sized Christmas tree I bought on Craigslist? After it took so long to put together, I didn't bother taking it down. It has lived displayed in all its undecorated glory in the corner of our bedroom for the last month. However, as soon as November rolled around, I got that thing out of there so it could breath with its pretty, new tree skirt. 

This means I can get all of my other Christmas decor out, right? Oh Christmas, how I love you.

Happy creating!
Miranda


June 17, 2014

How to Save $$$ on Project Life


Happy Tuesday!

If you know me, two things I'm passionate about are Project Life and saving money. I've regularly posted on these two topics. (The two most popular? Project Life Obsessing and Grocery Grumbling: How We Only Spend $60 a Week On Groceries.)
What is Project Life? It is a product line created by Becky Higgins which is aimed at taking the guess work out of layout design. Her product line offers up a variety of coordinating albums, journaling cards and photo pocket pages. Ultimately, Project Life is a method of scrapbooking using pocket pages to lay out a page without glue or fancy embellishments. It's specifically focused on recording memories through journaling instead of spending all your time jazzing up your page with glitter, stickers and rub-ons.
To be completely honest, the name-brand PL (Project Life) items are expensive. I thought it was pricey a year ago when I started and I still feel that way. You need three key items to complete a Project Life album: Core Kit + 12x12 Binder Album + Pocket Pages Pack. Each of these items are $30 a pop. That's $90 for the basics! No dividers, embellishments, envelopes. Heck! You have to still shell out the money for a year's worth of pictures to go in the thing.

After completing one full year album and getting half way through my second, I've learned a few tricks and tips to make Project Life better fit my budget. I have also tried off-brand products and were not satisfied with them. You can still get the quality PL products for the off-brand price!

Collect PL items throughout the year. I buy the items I need for the next year's album a little at a time throughout the year. Though few and far between, you will see Project Life products go on sale. For example, I keep an eye on the Michaels circular every week to see if they mark PL down. Last week, Michaels had all PL products 50% off.


I scored my album and core kit for next year for $30. These beauties are now hiding in the basement with the Christmas stuff to be wrapped and put under the tree. It's my Christmas present to myself every year. 

The morale of the story? Keep your eyes open for sales on PL all year long. Jump on a good deal and stick it away for the next year or use it now. Patience!

Follow Becky Higgins on Instagram or her blog. How do you know when these items are on sale? When I first started Project Life a year and a half ago, you could only buy PL products through Amazon. Now, you can find PL products at most major craft stores. Lucky for us, right?!

If PL goes on sale on Amazon or on the Becky Higgins website, you'll be the first to know via her blog or Instagram. (You can find her blog here. Her Instagram is here.) She's really good about hyping sales and giving the occasional heads up on future mark downs.

Besides getting a leg up on sales, there are free printables that coordinate with the core kits and of course, some great inspiration for your album. 

Put those Hobby Lobby/Michaels coupons to use.

The best part of PL coming to major craft stores? You can use those generic 40% off any regular priced items to add to your collection. I use these coupons to get the coordinating dividers or speciality card packs like my December Daily album for example.

Utilize freebies by other PL enthusiasts. A quick search on Pinterest will give you a slew of Project Life free printables made by fellow scrappers. I like to use these in my pages to mark a special day like a birthday or a day trip. If you'd like a short cut to some good freebies or need a place to start browsing, be sure to check out my Project Life board here.

Bonus Tip. As I said before, you've got to buy prints of your pictures to fill your album! Buying prints can get pricey too especially over the course of a year. I've tried every printer from Walmart to Snapfish in my years of scrapbooking. Who I personally recommend and use? GrooveBook!

For $2.99 a month, I get 100 4x6 pictures in a book. The pictures are perforated so you can easily pull out the pictures you'd like to go in your scrapbook.

You have to download their free app, follow the sign up instructions and upload your pictures. I take almost ALL of my PL pictures with my iPhone so this works wonderfully for me.

Would you like to try it out for free? Use the coupon code WINSLETT5 to get your first Groovebook FREE.

Disclaimer: I was not compensated by neither Project Life nor GrooveBook for any part of this post. I just love these products - plain and simple. All opinions in this post are strictly my own. I hope they help you in your Project Life endeavors!

What are some ways you cut your PL costs?

Happy scrapping!
Miranda 


June 3, 2014

Setting Goals for Your Creative Business + Giveaway Winner


Can I just say that Jiminy Cricket is a smart little guy? (C'mon ya'll know I just had to throw a Disney reference in here somewhere!) Although I probably wished on more than one star, my dream of working at PaperLark Studio full-time has become reality. What a wonderful new (and kind of scary) adventure, right?

Personalized When You Wish Upon A Star Art Print - Baby Delicious
Stepping forward, I know that I've got to make some solid goals in order to be successful. In the last two years of building my creative business part-time, I've learned a few key factors in setting goals for a creative business.

Find your focus. When I get excited about something, I tend to over do it. I'm usually a big believer in doing all or nothing. However, I quickly learned that when it comes to owning a creative business trying to be the Walmart version of an entrepreneur will not get you very far. You have to hone in and focus your talents, energy and time into one creative pursuit. For me, that pursuit is creating custom stationary goods which brings me to my next point.

Be creative on the side. Even before the concept of PaperLark Studio came into fruition, I was a craft and DIY fanatic. As a creative entrepreneur, I think it's critical to keep that spark alive by focusing some of your creative talents outside of your creative business. For example, on the weekends, I'm satisfying my crafting quench with sewing projects and scrapbooking - nothing related to creating or designing invitations. By keeping the two separate, I don't get burned out and it keeps the creative juices flowing so to speak. 

Be you - all the time! Ultimately, you are your brand. This also tails off of finding your focus. You can't be everything to everyone. You've got to find your niche. At the end of the day, there's nobody better than being yourself cause there's no one else like you! The good Lord above created your niche for you. 

Create your goals around how you want to feel. Is it cheesy? Maybe. However, every book I've ever read about pursuing your own business advises you to consider this. Quite frankly, I think it's the best guide to helping you form the basis to construct your goals. About a year ago, I read How to Grow Your Handmade Business by Kari Chapin, who stresses the importance of creating a business plan and setting strong goals for your business, and wrote down three words describing how I wanted my business to make me feel. I wrote: free, self-sufficient and successful. It was around those three words that I built my business plan and goals. 

Dont' forget about the other components of owning a business. I think most creative entrepreneurs would agree - we'd love to make things all day long and not have to worry about yucky things like accounting or taxes. However, it must be done! If you neglect them, you won't be able to grow your business which is the ultimate goal, right? 

In order to not forget about these other key components, I divide them into categories and strive to make at least one goal for each. 

I've listed my categories and subsequent goals for each below. Of course, your categories and goals will differ depending on the type of creative business and where you are in your pursuit. 

  • Accounting and Financing
    • Goal. Learn and thoroughly understand how to file quarterly taxes.
  • Creative Direction / Products
    • Goal. Explore getting into some local boutique shops.
    • Goal. Create party packages for all birthday invitations.
    • Goal. Participate in at least one other craft show this year in addition to Market Day.
  • Marketing and Branding
    • Goal. Expand outreach on Facebook by posting at least 3 times a week.
    • Goal. Create some quality content for the shop's blog.
  • Studio / Production
    • Goal. Keeping the office clean and organized!
    • Goal. Purchase better printer and keep printing in-house.

It's time to put your helmet on and enjoy the ride. Bring on the adventure!

Let's Be Adventurous Art Print - Elm Street Studio 
What are some goals you have for your creative business? 

Miranda

P.S. Congratulations to Danielle Marie for winning the six pack of handmade cards from Studio 266.

Disclosure: This post does contain an affiliate link. I will receive compensation if a purchase is made. 


Follow my blog with Bloglovin

March 25, 2014

Take-A-Look Tuesday /// Baby Patchwork Quilt


I've added a new fabric designer to my list of favorites - Michael Miller. In particular, I fell in love with the Citron-Grey collection.

The problem? Most of the patterns I wanted for my quilt were not in stores any more because they had been discontinued. Solution? Etsy, of course. I found almost all of the patterns I wanted at Five Monkey Fabrics.

I used a tutorial from Sew 4 Home in piecing my quilt together. While I didn't follow it in its entirety, it was a very good guide when it came to cutting out my fabric.


This is my first patchwork quilt and the first where I made my own binding. (Special thank you to Mrs. Gayle for some really helpful instructions!) I absolutely love it! At the moment, I can't bear to part with it just yet. Maybe, I'll put it up in a special place until I have my own youngin' for it. The white block on at the very bottom of the far right is waiting for a monogram after all...

Now to find a new project!
Miranda

March 5, 2014

Take-a-Look Tuesday /// Pomodoro Sauce with Spaghetti


So...it's not Tuesday, but we are going to pretend like it is for this post.

Wednesdays are usually the days I don't post anything. Typically, I spend Wednesday playing catch up on anything I'm behind on so it's done and out the door by Friday. However, I was so busy yesterday it became my Wednesday.

Now that's out of the way, I've got a yummy recipe to share with you - Pomodoro Sauce with Spaghetti!

Why do I love it? First, like with any other recipe I share, it's super easy. Second, how can you not love tomato and basil together? Third, it's really healthy and low calorie so you don't have to feel bad about going back for seconds.

What You'll Need
1 tbsp butter
1 chopped onion
4 cloves of garlic, minced
(2) 28 oz. cans of diced tomatoes
1/2 cup of chicken broth
basil
parsley
salt and pepper
thyme
nutmeg
spaghetti noodles

  1. Melt your butter over medium heat in a large skillet. (And I mean large because you'll be putting all your ingredients in it.) 
  2. Add onion and garlic. Cook until the onions are transparent. Add tomatoes and cook down some of the liquid.
  3. Add in broth and remaining ingredients. Add the herbs to your liking. I guess-imate and taste test until I'm satisfied.
  4. Cook on simmer for about 30 minutes. Once 30 minutes is up, pour your mixture into the blender and puree it into a sauce.
Fix your spaghetti noodles and pour that delicious pomodoro sauce on top.

YUM!

Happy cooking!
Miranda


Related Posts Plugin for WordPress, Blogger...
Powered by Blogger.
Designed By Boutique-Website-Design