Showing posts with label Christmas. Show all posts

December 4, 2014

DIY Christmas Stocking Bow Tutorial


This year, my mother and sister will be at our house for Christmas. I wanted everyone who will be waking up at our house on Christmas morning to have a stocking. With five stockings on the mantel, I wanted a cute, but easy way to differentiate between them.

Originally, I had thought about getting small wooden letters, painting them and then writing the names on them. However, my Christmas budget is pretty much spent so I needed to come up with something from supplies I had on hand. Here's what I came up with:


The ribbon is actually left over from a partially used roll from our wedding. I'd been trying to use it up by using it to wrap presents. It's so wide and the finish was perfect for me to write the names on. I wouldn't advise using satin ribbon because your ink will bleed. 

What You'll Need:
2-3" wide ribbon {mine was 2.5"}
Scissors
Sharpie
Safety Pins

Step One. Tie a bow with your ribbon, making it your preferred size. Before cutting your ribbon, be sure your two tails are long enough to write the name on. 

Step Two. Cut a small V on the tail ends. Take your sharpie and write the name on the ribbon. If you are lefty like me, proceed with caution so you don't smear the ink like I did on my first ribbon!

Step Three. Stick your safety pin through the back of the knot in the middle of your bow. Lastly, simply pin your ribbon onto your stocking.


Now then, you've just got to repeat that for how many every bows you need. The only tricky part was trying to get them to look close to the same size. After playing around a little, I think I did pretty well. In all, I made all five of these in about 30 minutes.

Happy Holidays!
Miranda

November 27, 2014

Free Printable Holiday Gift Tags //// BLACK Friday

Happy Thanksgiving!

I am so grateful for each and every one of you! Thank you for hanging out in my little piece of the blogosphere. Thank you for supporting PaperLark Studio. Thank you for allowing me through that support to be able to live my dream every day and provide for my family!

To show just a smidgen of my gratitude, I thought I'd share three gift tags with a few of my holiday designs on them for you to use this holiday season. I printed my tags on kraft paper, but you can certainly use whatever card stock you prefer!


Starting today, for Black Friday, Small Business Saturday and Cyber Monday, I am offering free gift wrapping* and free shipping on all orders. {Say what?!} Just use the coupon code XMAS14 at checkout! 

Once you receive your wrapped order, just print one of these tags out to finish off your gift. Of course, I'd love to see any and all pictures, so use the hashtag #paperlarkstudio. I just might share it!

Now, go take a much deserved nap. I'll take care of the gift wrapping!
Miranda

*Free gift wrapping is not included on invitations or photo greeting cards.

November 20, 2014

DIY Vintage Window Christmas Advent Calendar


For the last couple of years,  I wanted to do an advent calendar. However, when you don't have any children, I don't think it drums up the same excitement. But, I decided to make an advent calendar for my two little fur balls that I knew would get excited everyday about it. Ha! In each bag, I've stuck a dog treat for each pup. Even though they won't understand {or care for that matter} why they'll be getting a treat for 24 straight days, it'll make me happy.

I had an old window sitting down in the garage that I had rescued a while ago from a barn. I've been holding onto it, waiting for the right project to come along. Alas! I thought it would make the perfect addition to my advent calendar. 

I pulled the window out of the garage, wiped it down really well and got to work. This project didn't actually cost me anything because I had all the supplies already {big yay for being a craft supply horder!}. However, if you can get your hands on an old window, I'm sure this project wouldn't take much to make. 


What I used:
Old window
Twine
Hot glue gun and glue sticks
Brown paper bags
Ribbon
Scissors
Stapler
Paint Pen
Treats for the bags

Step One. Create your bags. I used large lunch paper bags. Because the large bags were clearly too big, I cut them into fourths and just stapled the edges to make my smaller bags. {Of course, you could buy small paper bags and skip this step} 

Step Two. Once I had 24 smaller bags, I took a paint pen and drew my letters on each bag. Let these dry really good and then stick your treats in, folding over the top. 

Step Three. Prepare your window. Measure out your twine and then glue it on the back of the window frame. Do this with each twine piece you'll need. {On my window, I used five twine lines and fit five bags on each - expect for the last one which only had four bags.} Let the glue harden.


Step Four. Tie your pretty ribbon in a bow onto the twine and then staple the bag to the ribbon. Do this for each of the 24 bags. I staggered the lengths of my ribbon so the bags would hang at different lengths just to give it some character. 


Once you have all 24 bags tied and stapled, you can embellish your window frame any way you'd like. My window had one pane of glass left in it, so I took a paint pen and did a little hand lettering to jazz it up. I also added some garland around the outside. 


My advent calendar is now resting on top of a short bookshelf beside our Christmas tree. It took my Yorkie, Bentley, less than 24 hours to discover mom's new creation had dog treats in it. He spent a better part of this morning arrff-ing at it, trying to convince me we should start adventing today. I gave him a chew bone in hopes he will forget about it and so far so good.   

Oh! And a quick tip if you need to purchase some materials for this project. Be sure to check out Raise.com! This handy site lets users purchase gift cards for less than their value which will help you save some extra cash. They do have gift cards to Joann's and Michaels {and more}. I'm trying to get into the habit of checking this website to see what gift cards they have if I'm planning a big project. I've seen gift cards up to 23% off. Every little bit helps! 

https://www.raise.com/buy-gift-cards
https://www.raise.com/sell-gift-cards 

Happy creating!
Miranda


December 23, 2013

The Christmas Home Tour 2013

Merry Christmas!

Tomorrow is Christmas Eve and I thought I'd give a little tour of our home all decorated. Seeing as this is our first Christmas in our first home, I thoroughly enjoyed decorating the house for the holidays.

When we first pulled our Christmas decor up from the basement, my husband said I had more than enough to decorate with. Once I had it all out and up though, he changed his tune saying, "I guess this house is a lot bigger than our apartment was." That said, I had all the excuse I needed to purchase some new staple decor items. Oh, how terrible, right?

I hope you enjoy the tour and happy holidays!
Miranda


December 18, 2013

December Daily Update

I apologize for that small hiatus. The holidays have been keeping me plenty busy and so has PaperLark Studio. I hit a huge milestone in November - I made more money with PaperLark than I did at the daycare. For me, this accomplishment is HUGE! I'm inching closer and closer to my goal of doing it full time. It is safe to say I have some very high hopes for 2014!

I haven't had too much time for anything crafty for two reasons - I've been wrapping a gazillion presents and  have devoted all my free time to my December Daily album. I'm absolutely loving doing a December Daily album although I'll be the first to admit it can be intense. It's kind of like dedicating yourself to working out every day except a lot more fun. I try to make myself sit down for 10-15 minutes each night and scrap a page from the previous day. Doing so, I've been able to keep up without a hitch.

I thought I'd share some of my pages, but before I do, look at the adorable presents I made my kids at work! Well, the wrapping anyway...


I found these adorable free printable tags over at Creative Index. I grabbed some washi tape and paper bags and ta-da!

Now for your December Daily inspiration...


Happy Holidays!
Miranda


December 10, 2013

Burlap Christmas Stockings

The following is a guest post I wrote for Sugar Bee Crafts which was published on Dec. 7th! I hope you enjoy!

Sick of the red, felt stockings from the dollar store? Me too! That's why I made these super easy burlap Christmas stockings. 


Happy Holidays! My name is Miranda and I blog over at Mr. and Mrs. Winslett. There you can find me sharing projects, tutorials, recipes and my latest Project Life pages. Be sure to stop by and follow along!

Photo

Let's get started already!


What You Need:
Burlap
Muslin
Sewing Essentials (sewing machine, scissors, straight pins, etc.)
And maybe a hot glue gun...

In the interest of keeping it real, I'll admit my first attempt at making my own Christmas stocking was a complete, epic fail. 

I used a template I had pinned a while back and it just didn't work with the burlap. Why? I can't really say, but I felt the shape was just awkward. 

Being wary of using another printable template from the Internet, I used my old felt stocking as a template and it worked perfectly! 

Also, a quick word about how much burlap and muslin you might need - I purchased one yard of both burlap and muslin. If I had not messed up at my first attempt, I'd estimate that I could've gotten 4-5 stockings out of my burlap. As for the muslin, you'll need maybe 1 1/2 yards total because you use the muslin to make the cuff at the top of the stocking. 

Woosh!

Step One. Fold the burlap in half, pin the old stocking on the burlap and cut around the old stocking leaving about 1/2 inch of seam allowance. Repeat with muslin.

[[NOTE: I advise folding the burlap in half to save you from having to cut and pin twice. Plus, the piece you cut will be identical which is crucial for a decent looking stocking!]]


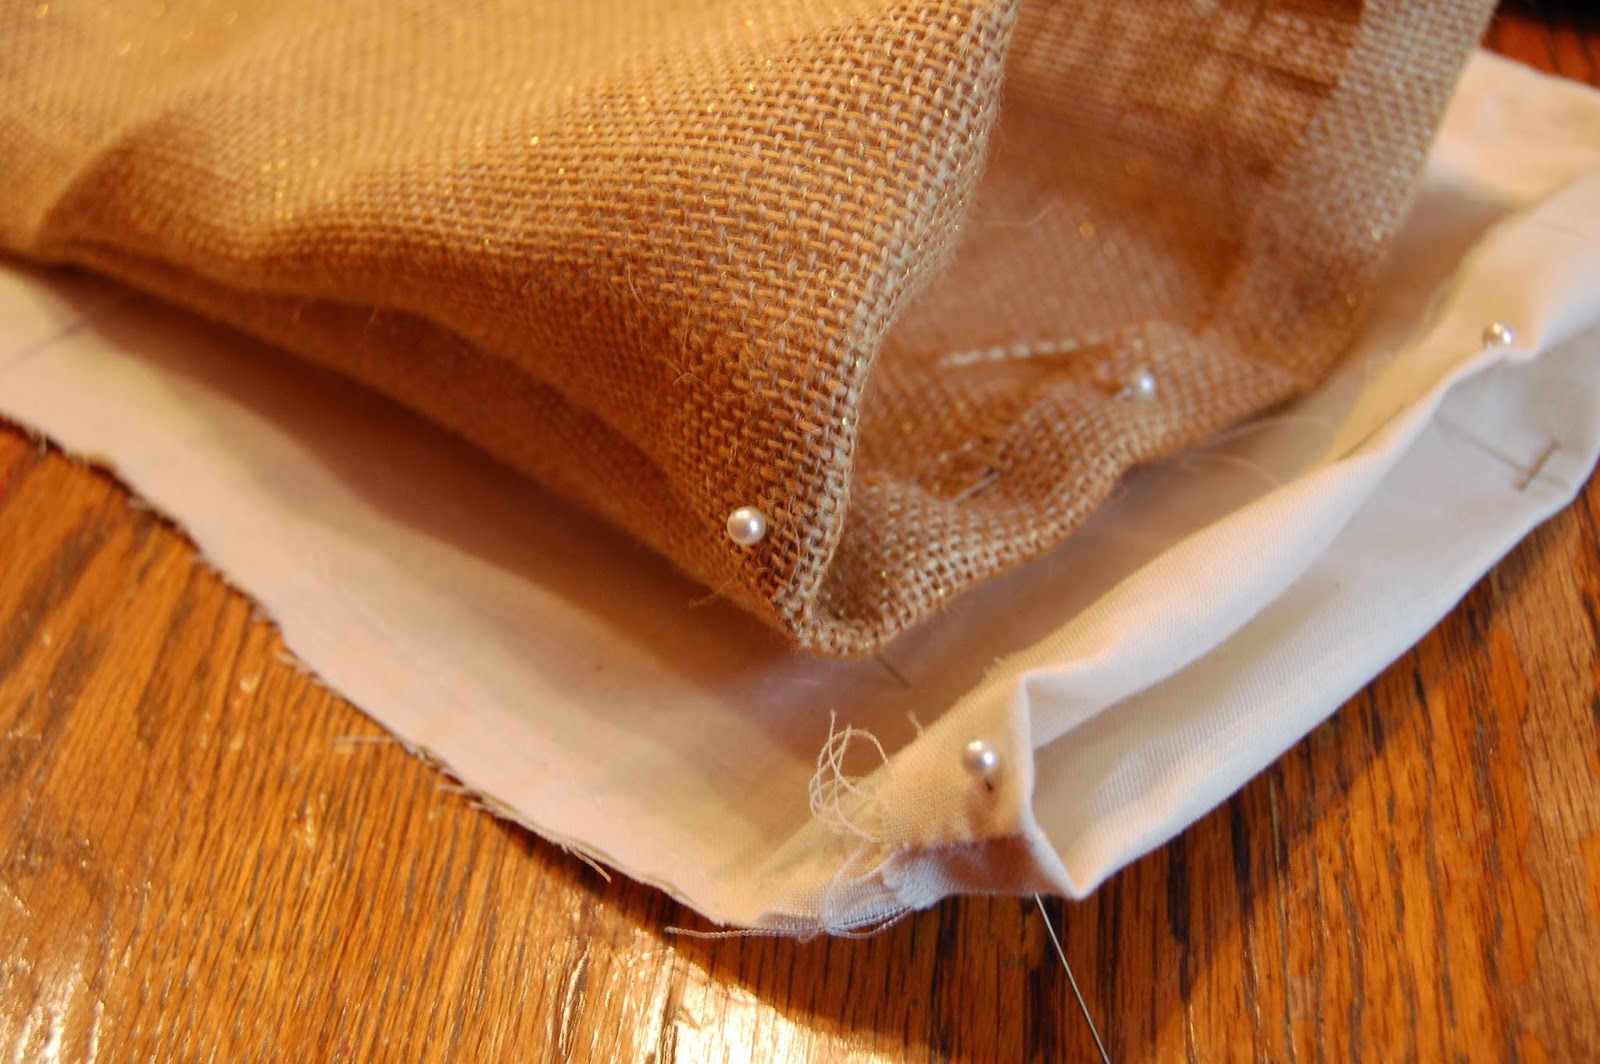
Step Two. You should have two stocking shapes of burlap and two stocking shapes of muslin. Pin your two pieces of burlap together and sew leaving the top of the stocking open. Do the same with the muslin.

[[NOTE: Because of the unraveling nature of burlap, be sure to give it a full 1/2 inch seam allowance. I learned this with my epic fail stocking.]]


Step Three. Take the open top of the stocking and fold it down about half of an inch down. Pin and sew. Do this with both the muslin and burlap.

[[NOTE: Fold the muslin to the outside and the burlap to the inside as shown.]]


Step Four. Slip your muslin stocking down into your burlap stocking lining up the tops. Pin and sew.


Step Five. Cuff time!  Fold your muslin in half again and lay your stocking on top of the muslin. Leaving a good inch from the stocking's sides, cut a chunky rectangle from the muslin around the stocking. My chunky rectangle was about 6 inches tall. 


Step Six. Fold over the top widths of the rectangle about half an inch, pin and sew. Fold over one height end of your rectangle strip, pin and sew. 

[[NOTE: Make sure when you fold over the widths that you have a straight line.]] 


Step Seven. Here is where I cheat...plug up that hot glue gun and attach that cuff. After doing a couple of these stockings, I've found it easier to hot glue the cuff on instead of sewing it. Ha! To do it, glue the finished side of your cuff to the seam on the side of your burlap stocking. Continue gluing until you hit the seam on the other side of the stocking. Once you get there, let's talk about making the loop to hang your stocking.


Step Eight. Cut a strip of burlap about 4-5 inches long and 1-2 inches wide. Fold in half length-wise and sew. Fold that in half width-wise and glue together to make a loop. Glue your loop in between the stocking and the cuff on the backside seam of the stocking. If that got confusing, hopefully this picture will help.


Step Nine. More than likely, you will have some excess fabric from your cuff. It's definitely better to have excess fabric than not enough. To finish your cuff, cut off the excess fabric about 1-1 1/2 inches from the stocking. Fold it under and hot glue against the seam to close the cuff. 

There you have it! One great thing about burlap is that it's pretty pliable. Therefore, you just have to play around with the burlap in your fingers to get it to hang the way you want it. 


Now then, hang your stocking up on the mantel! I've got two down and two to go. 


If you enjoyed this tutorial, then be sure to follow me and my blog via the social media below so you don't miss anything. 

You didn't hear it from me, but there just might be a tutorial next week on a no-sew burlap tree skirt that would compliment these stocking rather nicely!

See you then!
Miranda from Mr. and Mrs. Winslett


November 11, 2013

Curator of 60 (FREE) Holiday Fonts


Being a creator of invitations, announcements and anything stationary, I like to consider myself a curator and lover of fonts - especially free fonts.

That said, I thought I'd share my arsenal of free holiday font collections. I have a handful of blogger that I follow who are always pairing fonts wonderfully so be sure to check them out: Lia Griffith, Ella Claire and Yellow Bliss Road.

Free Christmas Script Fonts

Free Display Fonts For Holidays


1. Lavanderia {here}
2. Santa's Sleigh {here}
3. Contribute {here}
4. Christmas Tree {here}
5. St Nicholas {here}
6. Freebooter Script {here}
7. Christmas Cheer {here}
8. Hultog Snowdrift {here}
9. Chalk Hand Lettering {here}
10. Always Here {here}
11. Xmas tfb Christmas {here}
12. Holly & Berrie {here}
13. FoglihtenNo01 {here}
14. Janda Cheerful Script {here}
15. Xiomara {here}
16. Happy New One {here}

12 Font Combos for Holidays Cards and Invitations - Take the guesswork out of choosing fonts with another fabulous font combos round up from Yellow Bliss Road!


If you liked my collections of holiday fonts, be sure to follow me via the social media below so you don't miss any more!

Happy creating!
Miranda


Related Posts Plugin for WordPress, Blogger...
Powered by Blogger.
Designed By Boutique-Website-Design