Showing posts with label Organization. Show all posts

October 14, 2013

My Office Makeover


The aftermath of Hurricane Me is finally cleaned up. My office is finally organized! It felt like it took forever, but it was worth it. It may not look like much from the pictures, but a lot of work went into organizing this space. If you only knew how much craft goodies I own, you'd understand.

It is morphing into a space I love. Seeing as I spend most of my time in this room, I've really invested a lot into making it mine. When we first bought the house, here is what it looked like:


It was nice and neutral, but as I posted before we even bought the house, I wanted a pale pink on the walls. I felt it would give the room a soft feminine look, making it undeniable that it was my space.  


Before taking these pictures, I considered staging my office space a bit more by putting fresh flowers on the desk and hiding the objects that didn't match my poppy pink + pale pink + gold scheme. However, I decided it would be cheating my office out of what it really is - a work space. This is where PaperLark Studio lives and thrives. This is where the posts you read on this blog are written and given life. 

When I'm working, is my desk covered with pink hydrangeas and gold office supplies? Heck no! It's covered in order forms and business receipts with pens scattered everywhere. That's not say I didn't clean it up for ya'll though! It's just a real, functioning work space which is now organized. 


Let me share how I did it!

My desk is the Expedit Workstation from Ikea. I absolutely love it! It's not only home to my computer and office supplies, but also houses my Project Life supplies. All of which are appropriately labeled, of course! 

What editions do I own? Currently, I'm using the Seafoam Edition for my 2013 album you see here. I use the Olive Edition for special vacation pages and am saving that Midnight Edition which I got on sale for our 2014 album.  


Can I just say spray paint is amazing? My file rack and desk caddy were black until a $3 can of metallic gold spray paint rocked my world. If I could have spray painted my computer, I probably would have.

A closer look at the storage beside the desk:


The magazine and copy paper holders are also from Ikea. I've had these since college and they've held up pretty decent. The labels are from Tickled Peach Studio and are free! You can find them here. If there wasn't a pre-made label for what I needed, I used my labeler to print one out. 

Once again, the gold spray paint scores another victory for its revamp of my hot glue gun container. 


Where did this container come from? BJ's. It's the container my Cascade dish washing pellets came in. Ha!


All I did was remove the stickers with some Goo Gone and spray painted that sucker. Now, it houses my glue gun and an abundance of glue sticks. 


I organized a lot of my craft goodies into this rolling plastic drawer thing which I have also had since college. You can find these at Walmart. I also had a green one of these which I have since spray painted white. Today, it houses my fabric and sewing supplies in the sewing corner of my office (which is not yet complete). Once again, spray paint wins. 

I love the wheels on it because I can pull it to where ever I am in the room working. The categories I have on it are: Stamps and Adhesives, Craft Supplies and Stencils and Paint. 

 Above my desk, is my inspiration board.


 In my opinion, every office or craft room should have an inspiration board. It helps me to stay focused on my goals, reminds me of high points in the past and where I want to be going. Not to mention, who doesn't want a picture of a cute, little puppy poking out of a box to look at while you're working?!

On the opposite wall of my desk, I have an old TV stand sitting by the office door. I use it for office supply storage and of course, some craft storage. Mostly, I store my ribbon and buttons here.


Those little bottles are spray painted saline bottles. Perfect for holding buttons ya'll. I would say something about how awesome spray paint is, but...you get the idea!


Bella would be very unhappy with me if I did not share her favorite spot of the office with you all. Between my desk and sewing corner, Bella has her own little napping nook complete with her pillow and favorite blanket. 


As I have said numerous times before, I have the laziest co-worker ever so I might as well embrace it, right?


I hope my little slice of office space offered some inspiration!

What does your ideal office/crafting space have in it?

Miranda


April 17, 2013

The Construction Paper Moving Strategy


Operation move is in full swing with less than two weeks until closing. I've been playing around with some designs for our moving announcements and I think I've found a favorite. Once I get them sent out, I'll share them with the blog world and offer them up in my Etsy shop.

However, today we are going to focus on having an organized move.

By nature, I tend to be a control freak like order. Nothing about moving is orderly. That said, it is safe to say that having my life stuffed in boxes and stacked around the apartment is making me a nervous wreck. Ha! I'm also driving my poor, long-suffering husband crazy. Thank the Lord he loves me cause we'd have problems if he didn't. It also doesn't help this will be my FOURTH time moving in the last year. At least, it will be the last for a good long while!

Through the chaos of moving, I have managed to create a packing/moving system which is somewhat pacifying my need for order.

Packing Supplies:
- Boxes (of all sizes)
- Packing tape
- Newspaper and plastic bags
- Big, fat permanent marker
- Big pack of construction paper
- Scissors

Moving can be expensive. Lucky for us, we are only moving about a mile and half down the road and don't need to hire a moving company. However, moving can still get expensive if you have to buy boxes and wrapping material. Here's some moving-on-a-budget tips for you:

- Hunt for boxes everywhere. I asked my boss to save any boxes the daycare would be throwing out for me. Let me tell you she loaded me up! R.J. did the same and brought them home from the grocery stores he works at. Also, enlist the help of your family and friends in your box hunting escapade. Our family and friends are still bringing us boxes and we certainly aren't going to turn them down!
- If you know you will be moving, start hording your plastic bags from your weekly trips to the grocery store. Plastic bags make excellent packing material. Also, don't forget all those towels and sheets in your linen closet will make for great packing material!
-Gather your packing supplies into one spot. Pick a small box and put all your small supplies like the permanent marker, construction paper, scissors and tape in it.
 

Now, it is time to explain my color-schemed packing system.

Assign each room in your new home a color from your pack of construction paper. Here are my categories: Master, Bathrooms, Living Room, Kitchen, Bedroom, Office, Storage and Basement.

When I get a box securely packed, I grab its coordinating color of paper and write the room on the paper. On moving day, I will put a piece of the construction paper on the door or wall of the room in which the same colored boxes go. Make sense? That way, those who are not familiar with the layout of our new house will be able to find the right room for the right boxes. Maybe it is overkill, but it gives me peace of mind. We all know you can't put a dollar sign on that!


I do recommend designating one room to keep your boxes in. Of course, I have separated out the boxes by room in my designated moving room, but to each his own!

Happy packing!
Miranda

Bentley sleeping while mommy packs!


January 16, 2013

Organization Inspiration

Hi-de-ho readers!

I feel like I'm in an organizing lull. My work with PaperLark Studio has pretty much consumed my spare time. I'm definitely not complaining! I've been steadily adding new items and consistently completing orders. God is good, right?!

I think the second contributing factor to my organization lull is the fact we're starting the house hunting process. I'm no longer concentrating on how to make this two-bedroom apartment functional. Instead, I'm brainstorming ideas for our new, undetermined home.

With that, I'd like to share with you some organization inspiration that I've run across this week! Each of these posts offer some great ideas and storage solutions. So check them out by clicking on the pictures!

Bathroom Organizing Tips
The under-the-sink area in the bathroom is a major organization issue in our house right now...

I'm seriously really jealous of this craft room organization. I need to hit up the dollar store for some bins!

The tutorial for the burlap cardboard boxes is amazing! I want to try it.

See you Friday!
Miranda

November 5, 2012

Keep track of your freezer inventory


On Saturday, R.J. and I made the trek to his mother and stepfather's house to spend the day. My mother-in-law, Robyn, was overjoyed to learn we had recently been given a chest freezer which we were trying to fill. This time of the year, she is usually trying to thin out her freezer and find a home for the greens and zucchini that comes from Granny's garden. She loaded us up with all kinds of vegetables and meats.

When we got home, we threw the goodies in the freezer to keep them frozen, so I had no idea what all we had gotten. I made this Freezer Inventory worksheet for myself to keep track of what was in the freezer and thought I'd share it with you today! (You can get your own free printable worksheet at the bottom of this post!)


I pulled everything out this morning and recorded it onto my worksheet. Once I finished getting it all accounted for, I borrowed some magnets from the fridge and hung it on the freezer so I can see and access the worksheet easily. My plan is to mark off items as I use them or add a counting line as I add to my stash. 


This worksheet will make it so much easier to plan my menu and grocery list for the week too. Now, I know what's in my freezer without having to dig through it every week. Once this sheet has been marked all over to the point of uselessness, I can simply print out a new one. 

You ready for your free Freezer Inventory worksheet now? Alright! Alright! Here you go! 


Enjoy!
Miranda

October 29, 2012

Organization October: Under the sink


If you are anything like me, you hate that space under your sink. It's full of cleaning supplies which are strewn everywhere. My dish washing detergent also has a home under the sink because the cabinet is conveniently located next to the dishwasher. I'm always having to fumble or dig through the mess to get to the detergent packets.  


My organizational weapon of choice to attack this mess? An Under-the-sink organizer shelf which Bentley is modeling for us here:


I bought this expandable under-the-sink shelf. We have a pretty large space under our sink and I had a nice accumulation of cleaning products, dish detergent and trash bags that needed a home. 


The expandable shelf worked best for me because it allowed room for all this stuff and it fit nicely under the sink. 

I grouped all the trash bags and cleaning supplies together to put them on the shelf - putting the dish detergent packets and cleaning spray on the top shelf. Why? Easiest and quickest way to reach what I use most often. 

The finished product? An organized cleaning cabinet that is functional and easily accessible. No more digging!


See you Wednesday for a little post about our day-cation to the Georgia mountains!

Later!
Miranda

October 22, 2012

Organization October: Linen Closet

Follow my blog with Bloglovin

Are you ready for the second installment of Organization October? [If you missed the first one, you can check it out here.]


Over the weekend, I tackled our linen closet - problem area #2. It had become an accumulation and random assortment of embroidered hand towels, crumpled comforters and mismatched sheets. Nothing had a place and lived where it landed - or at least where it got stuffed. I cringed every time I opened the closet door. It was a no-brainer to put it on the list of problem areas for my Organization October series.


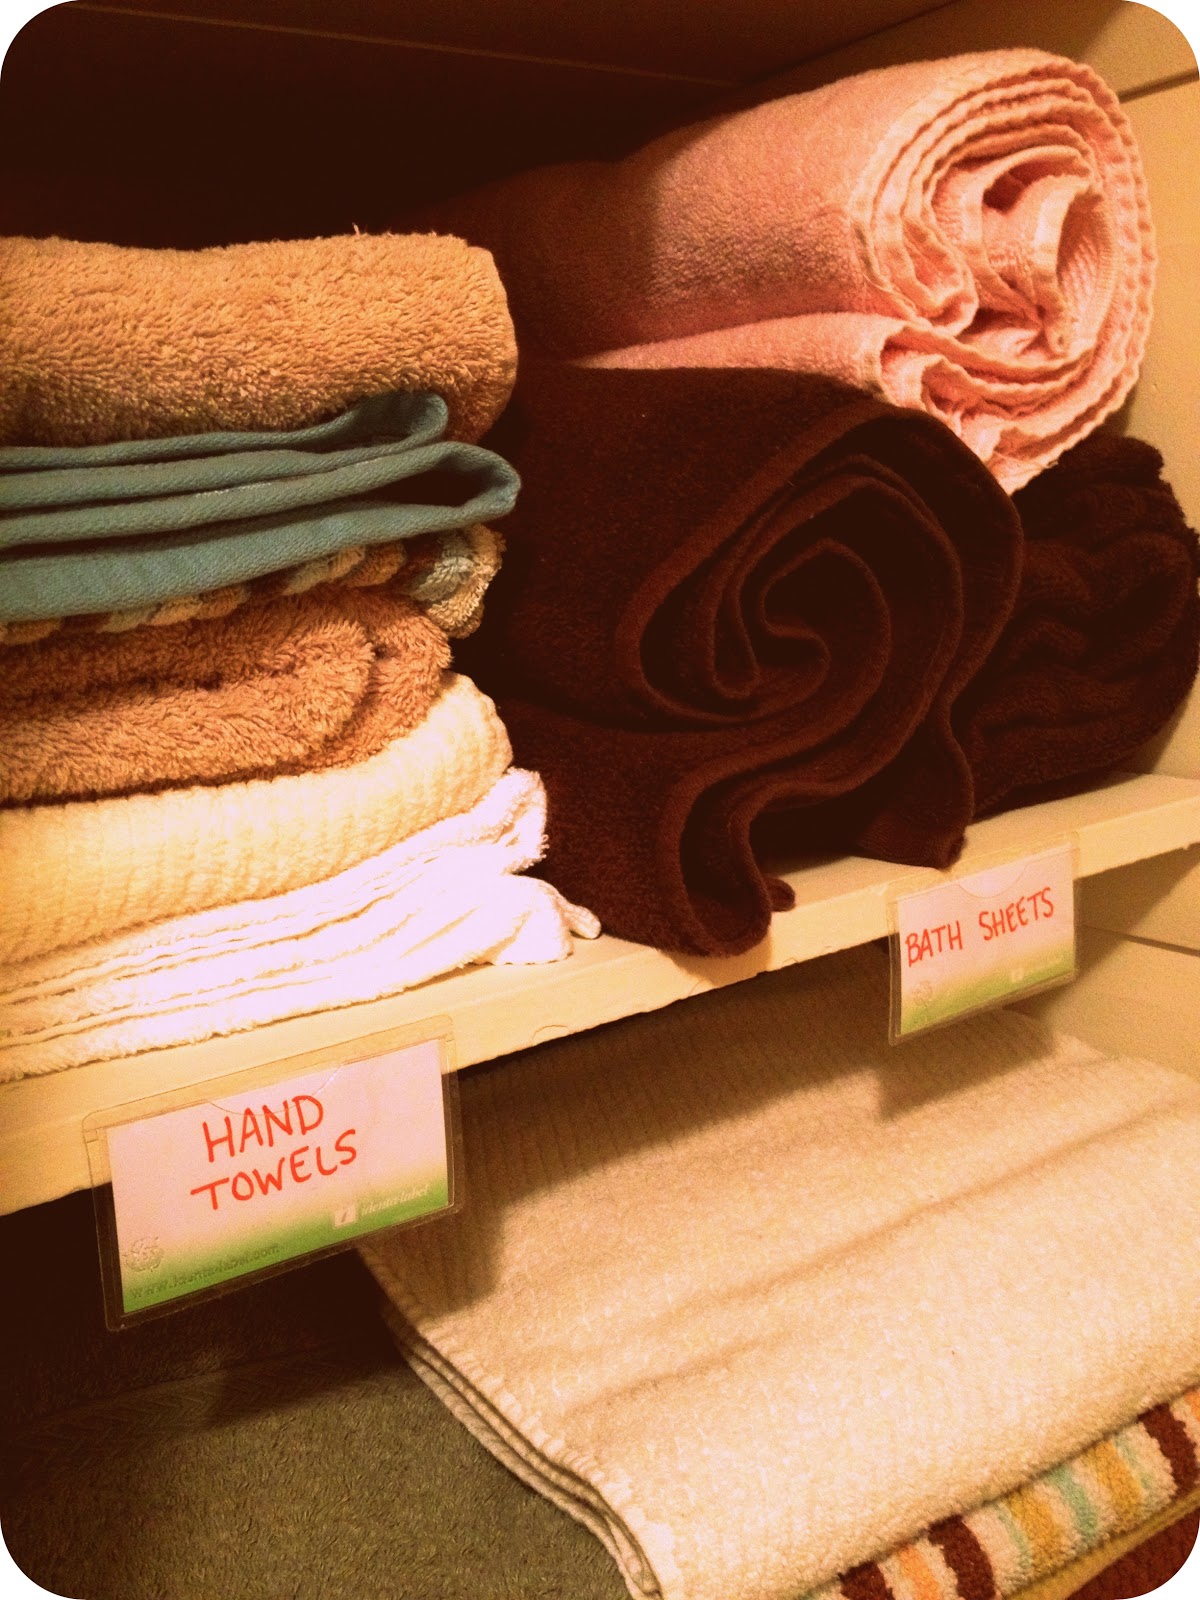
For this organization project, all I invested was time and some labels. I found some really cool labels at Walmart and I was able to find them online here if you'd like some for yourself. I really liked these labels because you can reuse them again and again. The labels slide out of the plastic holders so you can re-label anything. Here's an up-close of them: 


Now to the good stuff! I started first and foremost by pulling out ALL of the towels and folding them neatly. After I folded them, I arranged them into piles: finger-tip towels, wash clothes, hand towels, bath sheets and bath towels. I dedicated two of the four shelves in my linen closet to the towels. 


I decided to use the middle two shelves because the were the easiest to get to first. Whenever you organize, you should always keep functionality in mind. Placing my bath towels on the very top shelf wouldn't have been practical. I reach into the linen closet for a towel more than I do for bed sheets. Thus, our extra comforters and quilts found a home on the bottom shelf and the sheets on the top. 

Below the comforters and quilts (and behind that baby gate), I put R.J.'s tool box and our drill. I needed those some where easily accessible, but out of sight. Our toilet paper stash also lives on the linen closet floor ready to go!

Lastly, when it came to organizing the sheets, I'd like to share with you a helpful tip I ran across on Pinterest from the one-and-only Martha Stewart. 


Put your sheets in their matching pillowcases. Not only does it keep your sheet sets together, but it helps you easily stack them up together for a nice, neat look in your closet! As you can see, I've got my full size sheets on one side and the twins on the other!

There you have it! I've got one organized, labeled linen closet. 

Hope to see you back on Wednesday. I've got something new to hit the blogosphere with: Pinterest Test. Have you ever seen a craft, recipe, etc. on Pinterest that you wanted to try? I'll test out the Six-Layer Sourdough Club recipe for you all. Something tells me it'll be a good one!

See ya then!
Miranda 
  

August 30, 2012

Wedding Sneak Peek: Pocket Schedules


As you may have figured out by now, I really like organization and planning. I like it mostly because it helps me to stress out A LOT less when I have a plan.

I have no doubt that despite any amazing planning tools I have under my belt, the day of the wedding, prior to the ceremony will be stressful in and of itself. However, I am taking every step possible to make it as least stressful as possible. One of the steps? A day-of pocket schedule for everyone in the bridal party!

I popped open InDesign and started playing around. Then, the pocket schedule was born. When I went to Office Depot yesterday to have other wedding-related signs printed, I had 25 of these guys printed as well. When I got home, I folded them to perfection. I'm not gonna lie - I'm pretty proud of these if you can't tell!

Each member of the bridal party, parents and grandparents will receive their own copy at the rehearsal dinner so they know the timeline of the day and where/when they are suppose to be there. I've already stuck mine in my day-of bag.


SPEAKING of my day-of bag, you should definitely check back next week for a post on what's in my day-of bag! It'll be the official LAST wedding sneak peek post before the big day! And no, I still have not written my vows...

UPDATE 7/22/13: If you would like to purchase these pocket schedules customized for you own wedding, please send an email to paperlarkstudio@gmail.com! Thanks!

See ya!
Miranda

August 8, 2012

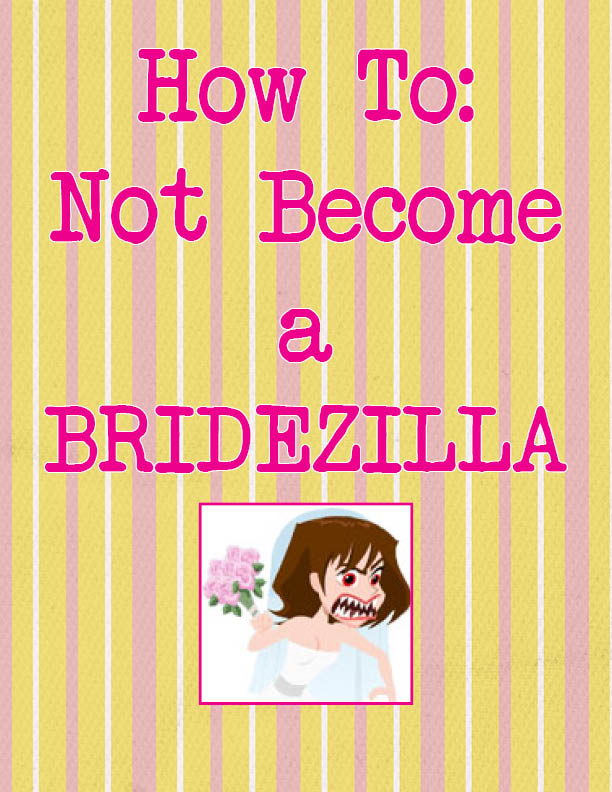
How To: Not Become a Bridezilla


Everyone says that getting married is one of the most happiest times of your life. What they don't tell you is that it's also one of the most stressful.

My favorite guilty pleasure right now is watching "Bridezillas" on WE tv - mostly because it is surprisingly therapeutic for me. In a way, I really can relate to them when they freak out because they are so stressed. 

Let's face it, ALL brides have bridezilla moments at some point and it's not just cause we are hot tempered.  

We become bridezillas after months of trying to stretch your budget impossibly thin, slice and dice your guest list (and then have awkward conversations with those who wonder why they weren't invited), finish a never-ending list of DIY crafts, figure out your attire, the groom's attire and the entire wedding party's attire (and then all your family's attire because they want your input too) and signing contract after contract after contract. 

Because there is no such thing as a "stress-free wedding," here are some handy tips I've learned through my wedding planning journey to keep from turning into a bridezilla:

     1.Do not procrastinate and organize! With weddings, you cannot wait until the very last minute. Doing so will shoot your stress level into the sky. The cake has to be ordered so far in advance and the photographer has to be booked. My strong suggestion: find a timeline you like and religiously stick to it! Here are a couple of my favorites: 
                                     a) MarryThis! Wedding Planning Timeline 
                                     b) TheKnot's Planning Checklist
     2.  Have wedding-free days every now and then. This is one of the BEST things that almost     husband and I have done during our engagement. We go on a date to dinner and the movies and say NOT ONE WORD about the wedding. Not only does it take your mind off growing list of things you need to do, it lets the two of you re-bond. Wedding planning puts a lot of stress on the couple because with wedding planning comes life planning too - like whose bank account will stay or where you both will live after the big day. By not talking about any of these stressful things and just having fun, I always felt rejuvenated the next day. 
     
     3. Don't be afraid to bug people. By people, I mean vendors or anyone who is overseeing some part of your big day. Chances are, your wedding is not the only one for your vendors. Be sure you don't fall by the wayside by routinely checking in with them to see how things are progressing. By knowing how every part is going, you'll feel more at ease and trust that things are coming together as they should. 

    4. Ask questions until you have peace of mind. My poor cupcake maker received three phone calls from me in a row this morning asking about the cupcake tower. I want to put a cake round on the top and needed to know the diameter of top tier. However, there is an inch hump on the top which complicates what I want. Without bugging the cupcake maker incessantly about the top tier, I wouldn't have known that and been up a creek on my wedding day. ASK! ASK! ASK!

     5. Ask for help. There is no way that I could any of this without my mother. She's the one who I bounce ideas off of and the one who stays up late with me finishing wedding crafts. I'm also fortunate to have some grandmothers who've volunteered to help finish up the remaining crafts too.  There's no way a wedding is a one-woman show. For the most part, you'll find that your family and friends were just dying for you to ask them to help with something.

Do you have any tips to add? I'd love to hear from you below! 

Over and out,
Miranda

August 6, 2012

How To: Create a Couponing System


I must admit I feel like quite the coupon fiend.

When I went grocery shopping with coupons two weeks ago, I got enough food within our budget to eat on for two whole weeks! I stretched the $58 I spent on groceries far!

While I didn't buy groceries last week, I did clip coupons for free school supplies. Seeing as I have no current need for school supplies, we donated the free items [three glue sticks and two really nice pens] to a local school teacher.

Now that I've been buying newspapers and collecting coupons for a little over a month, I needed a system to organize my coupons. The stack of circulars on my dining table was growing and getting out of hand.

My weapon of choice for organizing my tower of coupons? A file folder system.
My coupon filing system!
I gave each coupon circular its own tab. So, in my file folder, I have individual tabs for: SmartSource, RedPlum and P&G. You'll find SmartSource and RedPlum on a weekly basis while P&G comes out monthly.

In the Sunday paper, some stores like Publix and Target will put out store coupons. I made another individual tab for store coupons.

My next tab is labeled "Other." This tab is for coupon circulars that don't come out regularly. For example, in last Sunday's paper, General Mills put out a coupon circular for their items. It now lies in the "Other" tab.

Lastly, I have a "Restaurant" tab. I have coupons for meals at various restaurants like Red Lobster and Shane's Rib Shack stowed in this section. Let me tell you, these coupons are date night gold! Nothing like getting one nice meal and the other free. With these coupons, you can actually afford to go to a movie with the money you save on food.

Every Sunday night, I sit down and write the date at the top of every coupon circular I get. Next, I draft my weekly menu/grocery list around what is on sale this coming week. Personally, I use CouponMom.com which can break down deals based on the percentage that you save. Also personally, I don't get a deal that will save me less than 50 percent.

When I find a deal that I like, I write down the specific name of the product, what store to get it at, what the coupon value is and what circular I can find it in. Once my list is complete, I go through the circulars and clip out the coupons I need.

Of course, sometimes there is a deal for an item that I need like milk or dog food for Bentley, our Yorkie. At this point, I go through ALL my circulars again looking for these specific items. Last night, I was able to find a $1 off coupon for Iams dog food. While it might not make much of a dent on a $12 bag of dog food, it's still a dollar off something I'd have to pay full price for anyway.

What were my results this week? Here is my receipt.

Coupons and all, I spent exactly $40. However, I purchased $62.91 worth of food. My total savings as you can see above was $22.91.

The deals I am most proud of? I got two jars of Ragu spaghetti sauce for $1.38, a can of Gillette shaving gel for $1 and two Colgate toothbrushes for $1.58.

Happy Couponing!
Miranda

August 1, 2012

A Fresh Start...Again!

You win some, you lose some. I lost all my previous blog posts, but I now have a blog design that I'm in love with! [R.J. told me the previous one looked like MySpace and I kind of agree.]

That said, I hope you take the time to bookmark this blog or pin it on a board to come back to later as I rebuild my posts. 

I'm hoping to get a post up about our wedding - perhaps a sneak peak/behind-the-scenes look!

But for now, I will leave you with a picture of our little fur-baby Bentley which just oozes cuteness. 

Love Always!
Miranda


Related Posts Plugin for WordPress, Blogger...
Powered by Blogger.
Designed By Boutique-Website-Design