November 20, 2014

DIY Vintage Window Christmas Advent Calendar


For the last couple of years,  I wanted to do an advent calendar. However, when you don't have any children, I don't think it drums up the same excitement. But, I decided to make an advent calendar for my two little fur balls that I knew would get excited everyday about it. Ha! In each bag, I've stuck a dog treat for each pup. Even though they won't understand {or care for that matter} why they'll be getting a treat for 24 straight days, it'll make me happy.

I had an old window sitting down in the garage that I had rescued a while ago from a barn. I've been holding onto it, waiting for the right project to come along. Alas! I thought it would make the perfect addition to my advent calendar. 

I pulled the window out of the garage, wiped it down really well and got to work. This project didn't actually cost me anything because I had all the supplies already {big yay for being a craft supply horder!}. However, if you can get your hands on an old window, I'm sure this project wouldn't take much to make. 


What I used:
Old window
Twine
Hot glue gun and glue sticks
Brown paper bags
Ribbon
Scissors
Stapler
Paint Pen
Treats for the bags

Step One. Create your bags. I used large lunch paper bags. Because the large bags were clearly too big, I cut them into fourths and just stapled the edges to make my smaller bags. {Of course, you could buy small paper bags and skip this step} 

Step Two. Once I had 24 smaller bags, I took a paint pen and drew my letters on each bag. Let these dry really good and then stick your treats in, folding over the top. 

Step Three. Prepare your window. Measure out your twine and then glue it on the back of the window frame. Do this with each twine piece you'll need. {On my window, I used five twine lines and fit five bags on each - expect for the last one which only had four bags.} Let the glue harden.


Step Four. Tie your pretty ribbon in a bow onto the twine and then staple the bag to the ribbon. Do this for each of the 24 bags. I staggered the lengths of my ribbon so the bags would hang at different lengths just to give it some character. 


Once you have all 24 bags tied and stapled, you can embellish your window frame any way you'd like. My window had one pane of glass left in it, so I took a paint pen and did a little hand lettering to jazz it up. I also added some garland around the outside. 


My advent calendar is now resting on top of a short bookshelf beside our Christmas tree. It took my Yorkie, Bentley, less than 24 hours to discover mom's new creation had dog treats in it. He spent a better part of this morning arrff-ing at it, trying to convince me we should start adventing today. I gave him a chew bone in hopes he will forget about it and so far so good.   

Oh! And a quick tip if you need to purchase some materials for this project. Be sure to check out Raise.com! This handy site lets users purchase gift cards for less than their value which will help you save some extra cash. They do have gift cards to Joann's and Michaels {and more}. I'm trying to get into the habit of checking this website to see what gift cards they have if I'm planning a big project. I've seen gift cards up to 23% off. Every little bit helps! 

https://www.raise.com/buy-gift-cards
https://www.raise.com/sell-gift-cards 

Happy creating!
Miranda


November 18, 2014

Tuesday's Top Three

Take a deep breath. Now, let it out with a huge groan. Yup! That's right. It's the time of year where I go back revisit and rewrite my business plan. {Insert a unanimous ewww! here}

I dread doing it every year. Though I grumble and groan about it, there's a reason why I subject myself to the torture year after year. Frankly put - my business couldn't succeed {and more importantly grow} without it! 

I wrote my first business plan about six months after opening my shop. Heck! When I opened my shop in July 2012, I didn't even know what a business plan was. It was only by chance I stumbled upon Grow Your Handmade Business by Kari Chapin {affiliate link} did I read about business plans and learn why they were so important. I purchased this e-book for my Kindle and make a point to skim over it every year before revisiting my business plan. It's that good!

My business plan helps me stay focused. While I may need it one day to show a bank or an investor, I really use it right now as the blueprint for my business. It tells me what I've done, what I'm doing, where I want to go and how I'll get there.

I've run across a handful of excellent posts/articles on tips for writing a business plan through the the last couple of years. I hope they'll help you as much as they've helped me in constructing my business plan!


1 /// How to Write a Freelance Business Plan - Start here! Regina from ByRegina.com offers a comprehensive how-to complete with an instructional walk-you-through-it video and free supplementary printables. Whether you are a blogger, designer, creative, etc., Regina gives you a great starting platform to begin creating your business plan.

2 /// Design a Business Plan for Your Creative Business - Amanda speaks directly to creatives in this post and offers some extra creative-centered points to add into your business plan. In my own business plan for PaperLark Studio, I merged Regina's suggested plan layout with Amanda's to better suit my needs.

3 /// How to Create a Marketing Calendar for Your Business - In the last year, my business has grown significantly. With the growth, I quickly learned that in order to keep up in 2015, I'd need to incorporate a marketing calendar into my business plan. In 2014, I {without a doubt} flew by the seat of my pants when it came to the marketing aspect of my business and probably lost some money because of it. Not in 2015! And that starts here.

If you'd like to see more awesome posts on blogging and business, be sure to check out my boards, The Etsy Shop and The Blogging World, on Pinterest.

Now it's your turn! Which blogs and/or posts about construction your business plan have been helpful for you?

November 14, 2014

Etsy Find Friday: Jane Foster

I literally just found this shop. Seriously! I stumbled across it Wednesday through an email from Etsy and instantly fell in love with it.

Photo by Jane Foster
Jane Foster creates soft toys, prints, pillows and pouches from her own Scandinavian influenced designs. She designs, screen prints and sews all from her studio in Devon, UK. Her love for Scandinavian design from the 50s and 60s shines through in all her products - my current favorite definitely being the Retro Santa.


She also has a Mr. and Mrs. Claus set! Isn't this too stinkin' cute?! She created these two to poke out of her daughter's Christmas stocking.


Not only would they make precious gifts for a kid, I think they'd be adorable to add to your Christmas decor. I know exactly where I'd put them in our house - on the bookshelf in our living room which is right beside our tree. 

Of course, she has some other non-Christmas cuties like these little foxes.


She was a featured Etsy seller a few years back. If you'd like to read more about the story behind her handmade shop, you can read her interview here. Also, be sure to check out her website! I'll be following her in the future when I need a little inspiration from a handmade business. It is pay day too. Perhaps, one of those little retro Santas will be finding a new home on my bookshelf!

Miranda


November 13, 2014

Freebie: Baby It's Cold Outside Art Print


This free printable is definitely inspired by the cold weather we are currently having. Tonight it is suppose to dip into the 20s! In Georgia, that never happens until January and it isn't even Thanksgiving yet! I will be spending my evening {and the next few from the looks of it} snuggled up close to a fire with a warm drink in my favorite mug.  

As winter creeps closer and closer, I hope this print will add some warmth to your home. I printed mine out and put it next to my Keurig. The printable is formatted as an 8x10, but you can print it as a 5x7 - just be sure to change your print settings!


I'd love to see a picture of how you used your free printable! Use the hashtag #paperlarkstudio or tag me in your post on any of the social media below.


Also, if you love anything "Baby, It's Cold Outside," be sure to check out my ever popular baby shower invitation with this theme in my shop.

Enjoy and stay warm!
Miranda


November 11, 2014

Tuesday's Top Three

Happy Tuesday!

Today, I thought I'd share three blogging/business posts that are currently rocking my world. Chances are that if a pin related to blogging or improving your handmade business rolls across my Pinterest feed, I'm going to click it. Sometimes, they are filled with the same run-of-the-mill dos and don'ts, but every now and them I run across a gem. These three below are gems!


1 /// Streamline Your Process - Breanna Rose has become one of my favorite blogs as of late. She nails me on the head with her second tip about working your best hours. As I go into this week, I'm going to make a conscious effort to utilize my best hours and not force myself into that eight hour straight mindset. 

2 /// Freelance Finances - A quick, yet insightful post about how Jay Adores handles her finances working for herself. She's a former accountant so she has to know a little something about money, right? She suggests paying yourself twice a month just like a regular bi-weekly paycheck. After reading this, I've been re-evaluating how I'll be paying myself and my business in the future.

3 /// Free Printable Blog Post Organizer - Ya'll know I love a good organizing printable. This sophisticated blog post organizer from Art & Style has my heart fluttering. Not only is it designing beautifully, it's practical and functional.  

If you'd like to see more awesome posts on bloggings and business, be sure to check out my boards, The Etsy Shop and The Blogging World, on Pinterest.

Now it's your turn! Which blogs and/or posts about blogging and business have been helpful for you?


November 7, 2014

Etsy Find Friday + Slightly Unsightly Sale


Happy Friday!

I thought I would share one of my latest favorite Etsy finds - Juniper & Ivy! In their shop, Jacqueline and Ashleigh sell unique, whimsical earrings from sustainable wooden products.


Some of these laser-engraved earrings also feature characters and symbols you'll probably recognize {and undoubtably love}.


All earrings from Juniper & Ivy are made from real Alder or Maple wood that is sustainably sourced from the USA. The earrings are made with Titanium posts and are hypoallergenic and nickel-free. 

I also love following this shop on Instagram. It's not uncommon for them to post flash sales and you can score some earrings for a great price if you have fast fingers. I was lucky enough to snag a pair of Mickey Mouse earrings and a pair of Minnie Mouse earrings during a flash sale a couple weeks ago. I plan on using them as stuffing stuffers!


Also, just a heads up! It is time for PaperLark Studio's Slightly Unsightly Sale which only happens ONCE a year. Whether it's smudging, proofreading failures, misprints or just discontinuing a product, mistakes and change happen. Time for you to cash in on my slightly unsightly, perfectly imperfect products! Every item is sold as-is. These items have been marked down 40-50% off their regular price! Every item is perfectly functional, just a tad funky with a bit more character! Sale ends Monday, November 10th! It's only while supplies last so you better jump on it! {Check out the sale here}

Have a fabulous weekend ya'll!Miranda

November 6, 2014

Easy No-Sew Tree Skirt Tutorial


Once upon a time {a.k.a. last month}, I decided to hunt for a larger Christmas tree. Last Christmas was our first in the house. The husband and I both agreed that our skinny, apartment-friendly six-footer looked a little out of place in our much larger living area.

I'd like to take a moment to get on my soap box: Why are artificial Christmas trees $300 or more? Are you people crazy?! That said, I hunted for my larger tree on Craigslist. Ha! After about a week or so of hunting, we bought a 7.5 foot Christmas tree for $35.

When we got it home, I wanted to put it together to a) revel in my thrifty, money-saving prowess and b) make sure I had all the pieces. After nearly two and a half hours of sorting through color-coded branches, I finally got that darn thing up and it was huge.

After seeing how fat and round the bottom of my new tree was, I knew my old, dinky tree skirt wouldn't even be visible. I needed a tree skirt that was 56" or bigger for this tree and those aren't cheap either at $60 or more.

The motto for this tutorial? Look for it on Craigslist. If you can't find it on Craigslist, make it.

Quick note: I purchased a 60" round tablecloth to use as the base of my tree skirt. It was cheaper than purchasing burlap fabric at the store. Plus, it saved me time from having to sew and hem the edges. The diameter of my tree is 55 inches. Here's how I made my 62" no-sew tree skirt:


Round Tablecloth
Paper Plate
Scissors
6" Burlap Ribbon (I used about 100 yards) 
Hot Glue Gun
Glue Sticks
String
Large Threader Needle


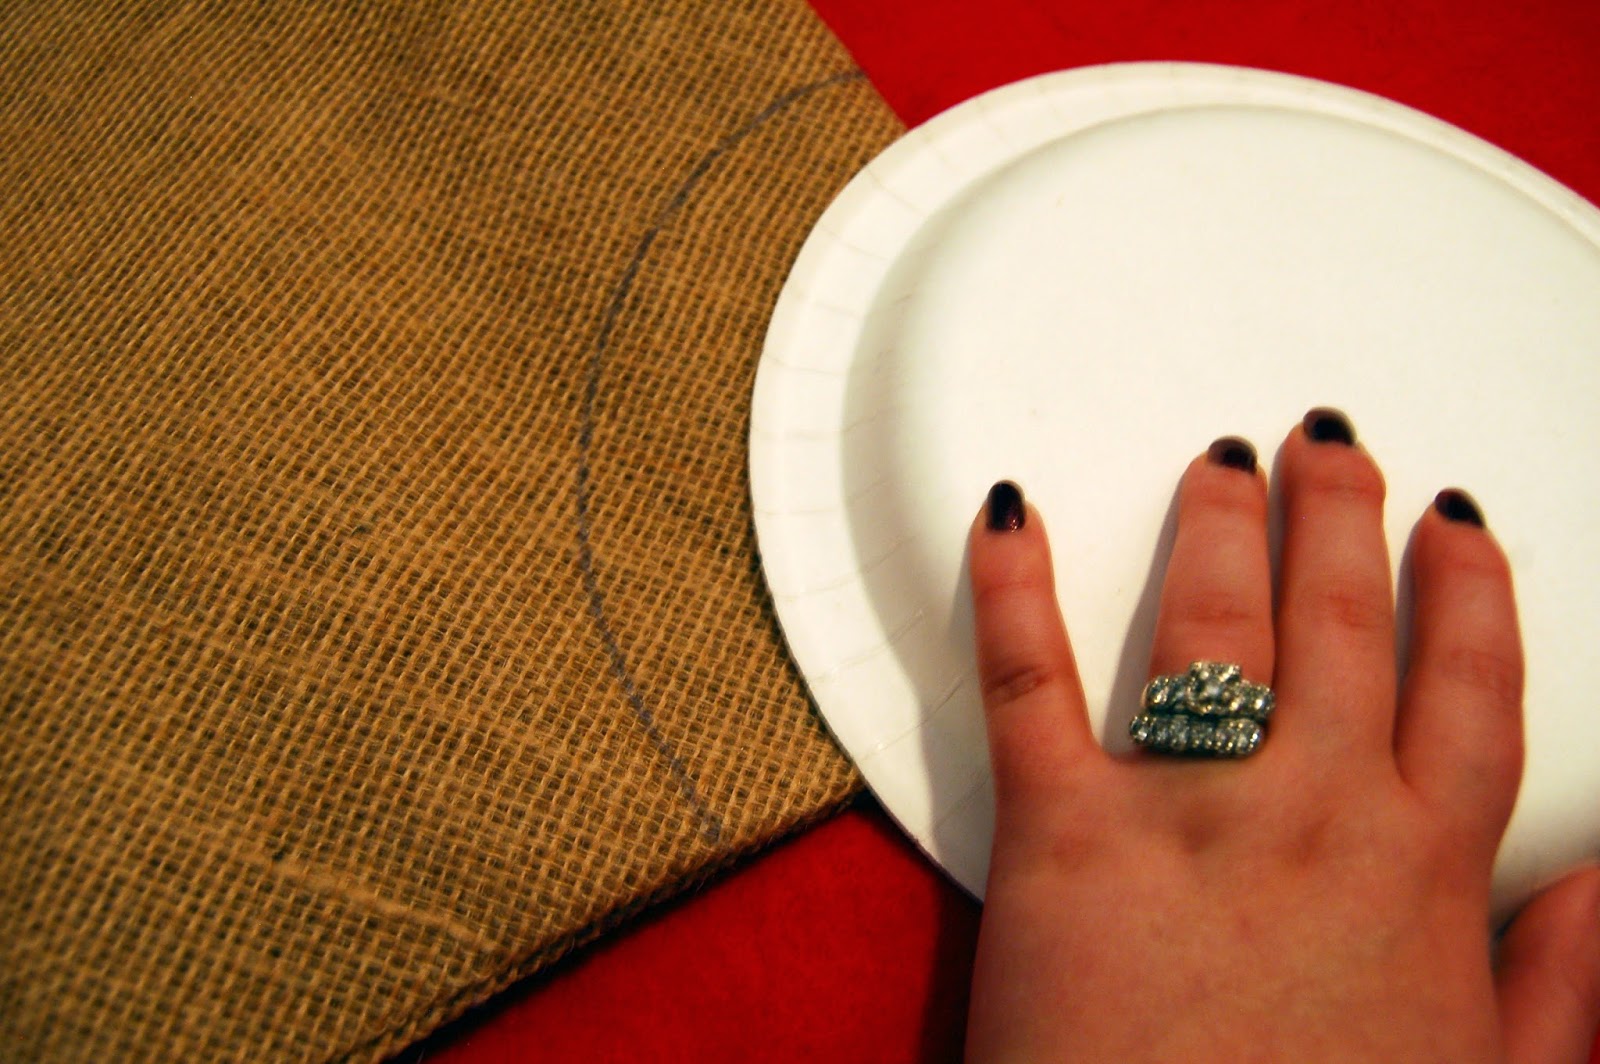
Step One. Fold your tablecloth into quarters. Using your paper plate as a guide, trace a quarter circle on the folded tablecloth corner. Cut along your traced line.


Step Two. Gather your burlap ribbon to make the ruffle. To do this, thread your string (yarn would work just as well) through the burlap using the large threader needle. {Note: Initially, I tried using regular thread, but it wasn't heavy duty enough to pull my burlap ribbon into a ruffle with.}


Gather your burlap ribbon on the string to create the ruffle. You'll have to do this with each roll of your burlap ribbon. 

Step Three. Once your burlap ribbon is all gathered and ready to go, simply glue the gathered edge around tablecloth hem. {Another perk to using the tablecloth - you don't have to worry about the glue seeping through the burlap! Just keep the glue on the hem.}

I didn't make an opening for my tree skirt. I like the solid, uniform look of my tree skirt. I just laid it over the top of the tree stand and then assembled the tree. To create an opening, simply cut a straight line from your hem to your middle.

In total, I spent about $25 on this tree skirt. 


As for the super-sized Christmas tree I bought on Craigslist? After it took so long to put together, I didn't bother taking it down. It has lived displayed in all its undecorated glory in the corner of our bedroom for the last month. However, as soon as November rolled around, I got that thing out of there so it could breath with its pretty, new tree skirt. 

This means I can get all of my other Christmas decor out, right? Oh Christmas, how I love you.

Happy creating!
Miranda


Related Posts Plugin for WordPress, Blogger...
Powered by Blogger.
Designed By Boutique-Website-Design